Ear Cuffs

Designed by Donna Zimmer
Skill Level: Beginner/All
Technique: Precision Forming Small Round Wire
Ear cuffs are a wonderful earring alternative for folks who do not have pierced ears or for those who just like 'the unique', and also great for teens! I originally made this design for a friend who could not wear pierced earrings, as a way for her to add the desired "glamour" she desired. These ear cuffs are fun to make and offer a wide variety of design possibilities such as adding a dangling headpin charm to the bottom loop, or using crystal beads for elegance.
Whatever you use to follow this pattern, remember that by making both earrings at the same time you will almost guarantee a matching pair!
Materials
- 2 7" lengths of 21 Gauge Round Half-Hard Wire
- 2 3" lengths of 20 Gauge Half-Round Half-Hard Wire
- 6 6mm Round/Faceted Gemstone Beads (Black Onyx Used in Sample)
- 10 3mm Round Metal Beads (Same Color Choice as Wire)
Tools
- Chain Nose Pliers
- Flat Nose Pliers
- Round Nose Pliers
- Double Barrel Bail Pliers
- Wire Cutters
- Ruler
- Extra Fine Point Marker
Instructions
-
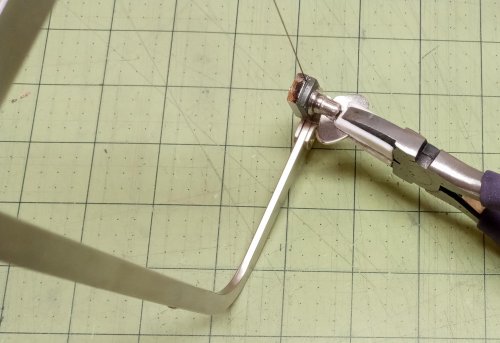
Straighten, clean, measure and then cut all necessary wires. On each 7-inch round wire, measure down 2-inches from one end, and mark. Use flat-nose pliers to fold each wire at this mark, and use fingers to press the folded wire back against itself. Repeat on the other wire. On the long end of each wire, from the fold, measure down 1 ½ inches and mark. Use flat-nose pliers to fold the wire again at this mark, back toward the center. Repeat on the other wire.


-
Measure the width of the folded section, find and mark the center and then mark 1/16 inch to each side of the center. Use a 2-½-inch piece of half-round wire to wrap the distance across the center, from side mark to side mark, 4 wraps to show on the front. Repeat on the other wire, making sure that it is in reverse position of the first, and wrapping in the opposite direction.


-
With the fronts of the pieces facing you, use flat-nose pliers to bend the shorter wire on each ear cuff at a 45° angle, away from the wraps. On each bottom longer wire, use flat-nose pliers to bend it in the opposite direction, at a 45° angle.


-
On the top shorter wires, thread on a 6mm bead and then a 3mm bead. Measure ¼ inch up from the 3mm bead and trim. Use round-nose pliers to make this shorter wire into a loop, rolling up toward the top of the folded segment. Repeat on the other ear cuff.


-
On the bottom longer wire, thread a 3mm bead, a 6mm bead and another 3mm bead. Immediately after the last 3mm bead, use flat-nose pliers to bend the wire up, so it lies alongside the beaded segment. From this bend, measure and mark ½ inch. Use round-nose pliers to hold the wire at this mark and use fingers to bend the wire back toward the center. Thread on another 3mm, 6mm, and 3mm beads. Immediately after the last bead, bend the wire up alongside the beaded segment. Repeat on the other ear cuff.


-
From this last bend, measure toward the end of the wire ½ inch and trim. Use round-nose pliers to form a loop with this shortened wire, heading out and up toward the last bead (matching the top loop). Repeat on opposite ear cuff.


-
Place the small barrel of the bail pliers on the back, end of the folded section (on the side of the ear cuff where the loops' ends are not). Roll the pliers toward the center, back of the ear cuff. Repeat on the other cuff, on the opposite side.


-
Repeat the above procedure on the other folder section, this time using the larger barrel of the bail pliers. Repeat on the opposite ear cuff.


-
Lay the ear cuffs side-by-side and make any necessary final adjustments. Enjoy!


 Free Wire Jewelry Patterns
Did you find this pattern through a link from a friend? This Free Wire Jewelry Pattern is just one of dozens of free wire jewelry patterns we send via email. Get patterns like this one straight to your inbox - click here!


