
Japanese Origami Bracelet
- Category: Chain Maille
- Technique(s): Chain Making
- Skill Level: Beginner
You only need two sizes of jump rings to make this bracelet, and one of them is quite large. That's what makes this such a substantial piece.
Materials

Sterling Silver Jump Ring Open (.051) 16ga. 9mm Heavy - Pack of 10
K11-36
- Lesson Quantity: 31.00 pieces
- Purchase Quantity: 4.00 pieces
- Price: $11.02
- Gold Club Price: $8.27

Sterling Silver Toggle Clasp Twisted 12mm - Pack of 1
K3-172
- Lesson Quantity: 1.00 pieces
- Purchase Quantity: 1.00 pieces
- Price: $4.62
- Gold Club Price: $3.47

Sterling Silver 16 gauge (AWG), 3mm ID ( inner diameter) jump rings
- Lesson Quantity: 95.00 pieces
- Purchase Quantity: 1.00 each
Tools

Flat Nose Wire Pliers
G2-506
- G2-506
- Lesson Quantity: 2.00 pieces
- Purchase Quantity: 2.00 each
- Price: $32.95
- Gold Club Price: $24.71
Instructions
Step 1
Make 2 Lengths of Chain:
Close some large rings and open a number of small rings.
Scoop up 2 large rings with a small ring and close it.
Open up the pair of large rings.
Close some large rings and open a number of small rings.
Scoop up 2 large rings with a small ring and close it.
Open up the pair of large rings.
Continue the chain: pick up a small open ring and use it to add another large closed ring to the chain. Continue the chain until it has about 12 large rings.
Start a new chain and use about 13 large rings.
Lay them out one above the other.
Start a new chain and use about 13 large rings.
Lay them out one above the other.


Step 2
Adjust the Chain Lengths to Fit:
Measure your wrist and decide on a finished bracelet length.
Subtract 1" for the clasp.
The length of the longer chain should equal this length.
Adding one large ring will increase the bracelet length by 1/4".
The two lengths of chain can have an equal number of large rings, or one can be a ring shorter than the other.
Step 3
Join the 2 Chains:
The photos show a close-up shot and a look at the whole chain.
Notice that the large rings of the top chain sit in between the large rings of the bottom chain.
You will use 2 small rings to connect each pair of large rings in the top row to a large ring in the second row. See the red dots.
Each large ring (except at the ends) will have 4 small rings connecting it to the rings that surround it.


Step 4
Fold and Connect the 2 Chains:
This is the fun Origami folding step!
Fold the top chain over top of the bottom one. It will look like the photo.
(Now is the time to make any final adjustments in length.)
This is the fun Origami folding step!
Fold the top chain over top of the bottom one. It will look like the photo.
(Now is the time to make any final adjustments in length.)
Now, connect them together at the bottom edge. See the red dots in the photos below that show where to place the first two small rings.
Continue adding small rings that join the edges until you reach the other end.

.png)

Step 5
Add the Toggle Clasp (Ring and Bar):
At one end of the chain put a 3 mm jump ring through the end ring and through the loop on the back of the ring-part of the toggle clasp.
At one end of the chain put a 3 mm jump ring through the end ring and through the loop on the back of the ring-part of the toggle clasp.
The bar-part of the toggle needs a shank so that it can fold sideways to pass through the ring-part. You'll use about 4 or 5 small rings and link them together into a mini chain like the photo.
Start by putting one small ring through the end ring of the bracelet. One-by-one, link a couple more rings onto that one, and then connect the final ring to the bar-part of the toggle.
Start by putting one small ring through the end ring of the bracelet. One-by-one, link a couple more rings onto that one, and then connect the final ring to the bar-part of the toggle.
Congratulations! Your bracelet is ready to wear and admire!









 Big Bad Pearl Necklace
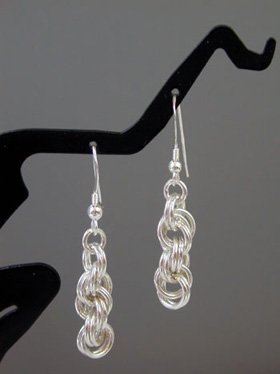 Double Spiral Chainmail Weave Earrings
 Petal Maille Pendant
 Barrel Weave Bracelet
 Japanese Takara Chain Maille Necklace
