The Five Cs of Wire Wrapping Step 5 Clean
The final step of a perfect wire wrapped loop is to clean. By this, I mean to tidy up any remaining tail that could poke you and cause discomfort when wearing your design. Keep in mind that the closer you cut (and cover!) in Step 4, the less cleaning you'll have to do in this step.
The final step of a perfect wire wrapped loop is to clean. By this, I mean to tidy up any remaining tail that could poke you and cause discomfort when wearing your design. Keep in mind that the closer you cut (and cover!) in Step 4, the less cleaning you’ll have to do in this step.
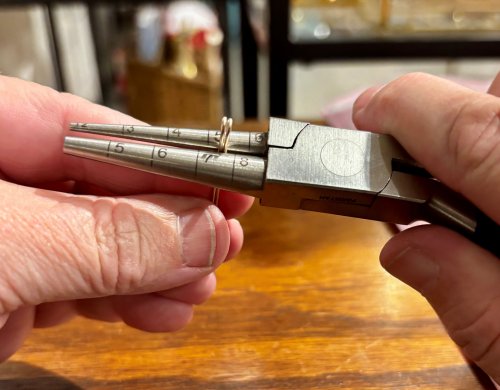
One of the most common mistakes I watch students make when they are cleaning is that they “push” the tail down by squeezing it between the jaws of their pliers. In actuality, this usually ends up with the last coil becoming slightly unwrapped at some point. Instead, you want to imagine that you “pull” the end down. The trick to this step is to hold the pliers at the proper angle.
1- Position the pliers so that the jaws are facing the tail. For example, if your tail is wrapping clockwise (as shown in the picture) the pliers will point counterclockwise.
2- Imagine that you are trying to grasp the top edge of the wire tail. Notice how my plier jaws are angled up slightly to try and catch just the top (left-hand side) edge of the wire. Now gently squeeze down so that the tail falls in line with the rest of the coil.
Remember, you don’t want your pliers sitting flat on the cut end of the tail. When you close the pliers, it will push the tail back, uncoiling the last wrap.
3-Depending on how long your tail is, you may need to reposition your pliers and repeat this step.
Over time, you will get so good at cutting in Step 4 that you will barely have any cleaning at all! I always clean, however, just to make sure my designs are as comfortable as possible.
Click below to navigate to the next lessons in this series:
Five Lessons to Perfect Wire Wrapped Loops
The Five Cs of Wire Wrapping Step 1: The Circle
The Five Cs of Wire Wrapping Step 2: Connect
The Five Cs of Wire Wrapping Step 3: Coil
The Five Cs of Wire Wrapping Step 4: Cover then Cut
The Five Cs of Wire Wrapping Step 5: Clean

Materials

Wire

Beads
Tools

WireJewelry - Ultimate Wire-Pliers Jewelry Pliers with Case, Set of 5
G15-20
- G15-20
- Lesson Quantity: 1.00 pieces
- Purchase Quantity: 1.00 each
- Price: $170.72
- Gold Club Price: $128.04
- Category: General Education
- Technique(s): Wrapping








 The Five Cs of Wire Wrapping Step 4 Cover then Cut
  The Five Cs of Wire Wrapping Step 3 Coil
 The Five Cs of Wire Wrapping Step 2 Connect
 The Five Cs of Wire Wrapping Step 1 The Circle
