- NEW DVD Series – Stone Setting with Bezels
- Tube Set Charm by Kim St. Jean
- Prong Basket Pendant by Kim St. Jean
- NEW DVD Series – Stone Setting with Cold Connections
- New DVD Series – Stone Setting with Wire
- NEW DVD Series: Introduction to Stone Setting by Kim St. Jean
- Featured Tool: Bracelet Bending Plier
- NEW Dvd by Eva Sherman
- Fun, Fast Fold Forming DVD Series
- Double Band Ear Cuff from Alex Simkin
Free Pattern: Twisted Copper Wire Cuff
by Judy Ellis, Wirejewelry.com
Wire Jewelry Pattern for May 22nd, 2017
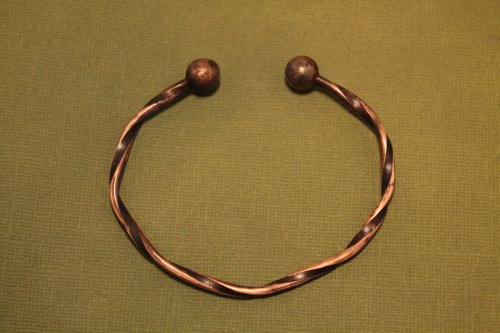
Twisted Copper Wire Cuff
by Judy Freyer Thompson
Want to try your torch at soldering with copper wire solder AND create a rustic copper cuff bracelet?
Grab some wire, your tools and let’s go!
Materials:
- 8 Gauge Copper Wire (Pattern Quantity – 1 Inch)
- 10mm Copper Beads (Pattern Quantity – 2 Pieces)
Tools:
- Jewelers Saw with Adjustable Frame without Blade (Pattern Quantity – 1 Piece, Product ID: G18-3)
- 20 pc. 61-80 Small Gauge Drill Bits in Metal Storage Case (Pattern Quantity – 1 Piece, Product ID: G26-60)
- 6-1/2 Inch Heavy Duty Flat Nose Pliers with Wide Jaws (Pattern Quantity – 1 Piece, Product ID: G2-94)
- Flex Shaft System, 1/4 Horsepower Motor (Pattern Quantity – 1 Piece, Product ID: HDP-150.00)
- Wood Handle Metal Brush, Brass (Pattern Quantity – 1 Piece, Product ID: BRS-968.00)
- 10 Piece Diamond Needle Files – 140mm X 3mm (Pattern Quantity – 1 Piece, Product ID: G14-8)
- 6 Piece Assorted File Set with Wooden Handle (Pattern Quantity – 1 Piece, Product ID: G14-7)
- Copper Solder Paste, 1/2 ozt, Soft (Pattern Quantity – 1 Piece, Product ID: SOL-824.10)
- 6 1/2 Inch Solid Stainless Steel Ball Peen Hammer (Pattern Quantity – 1 Piece, Product ID: G3-18)
- Fire Brick (Pattern Quantity – 1 Piece, Product ID: SOL-485.00)
- Handy Flame II Propane Torch (Pattern Quantity – 1 Piece, Product ID: SOL-330.00)
- Premium Steel Bench Block 2 1/2 X 2 1/2 (Pattern Quantity – 1 Piece, Product ID: G17-9)
- Deluxe V-Slot Bench Pin with Clamp (Pattern Quantity – 1 Piece, Product ID: BPN-105.00)
- Crocodile Sawblades – Cut 2/0 – Sold by the Dozen (Pattern Quantity – 1 Piece, Product ID: SAW-550.05D)
- Drill Press Vise (Pattern Quantity – 1 Piece, Product ID: VIS-265.00)
Directions:
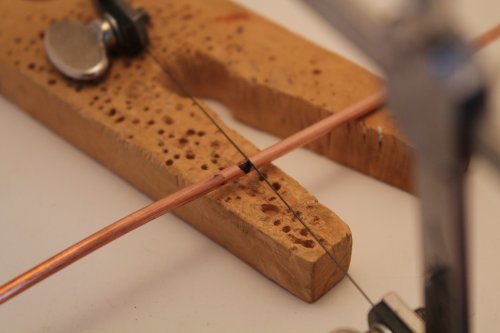
Step 1: Using a ruler and permanent marker, measure 8 ½” on the 8 gauge wire. Using a bench pin for support, cut the wire using the jewelers saw with a metal blade.
Step 2: Lightly sand the wire with the 400 grit sandpaper.
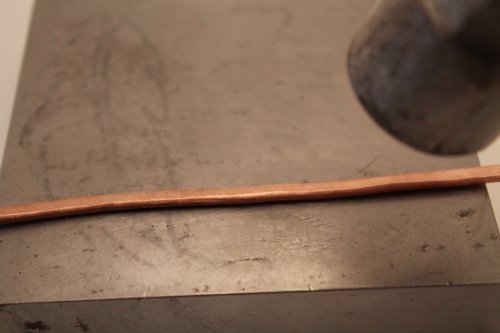
Step 3: Lay the wire on the steel bench block and flatten it using a heavy hammer. (I use the flat side of a 16 oz ball peen hammer)
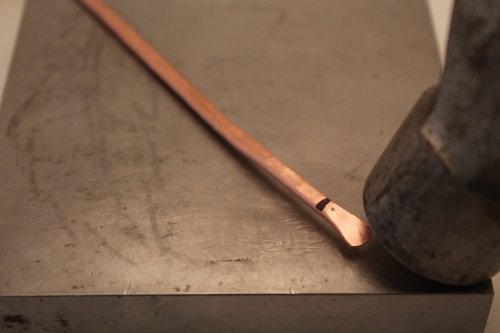
Step 4: Measure 3/8” off either end and flatten to the line on the bench block. These do not have to be perfect, they will serve as the tabs during twisting.
Step 5: Anneal the wire using the torch on a soldering brick. Let cool completely. Pickle the wire to remove the fire scale. Wash with soap and water and dry well.
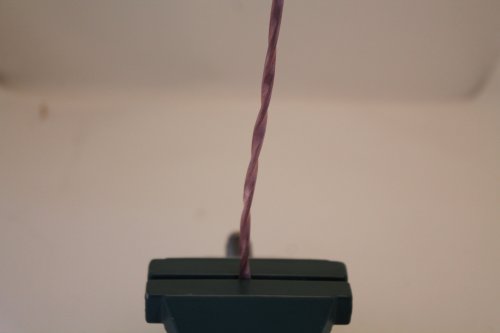
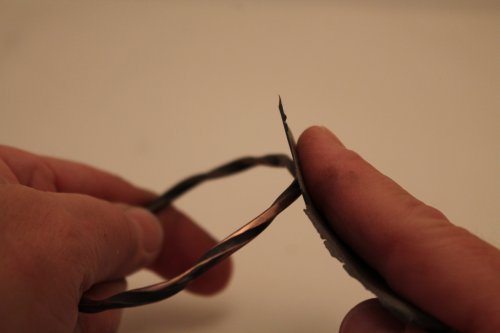
Step 6: Secure one paddle end in the bench vise. Grab the other paddle end with flat nose or duck bill pliers and twist the wire, keeping it vertical.
Step 7: Using a bench pin for support, cut the ½” paddle ends off using the jewelers saw and metal cutting blade.
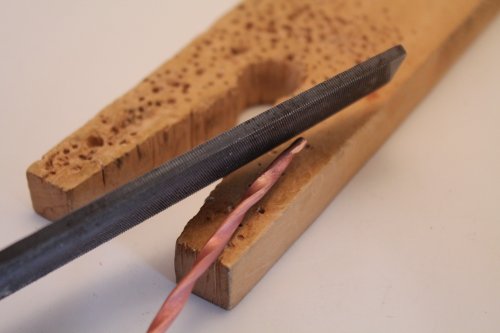
Step 8: File the ends smooth with the metal file.
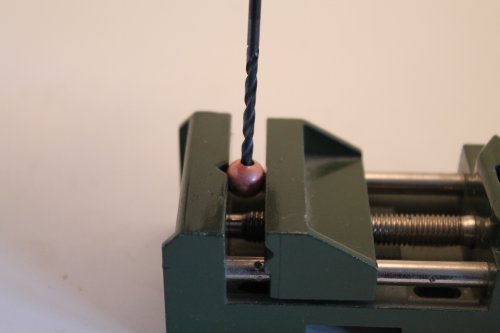
Step 9: Clamp one copper bead at a time in a small drill press vise, one that has a ‘v’ in it works great.
Step 10: Using a flexible shaft machine and 1/16” drill bit, enlarge the hole in the bead. Flip the bead and repeat on the other side. Drill the second bead the same way.
Step 11: Use the small round file to clean up the holes in the beads.
Step 12: Slide a bead on the end of the twisted wire, make sure it fits tight, as solder does not fill in gaps. Refine the filing on the twisted wire as needed to fit the bead. File the end of the twisted wire flush to the bead.
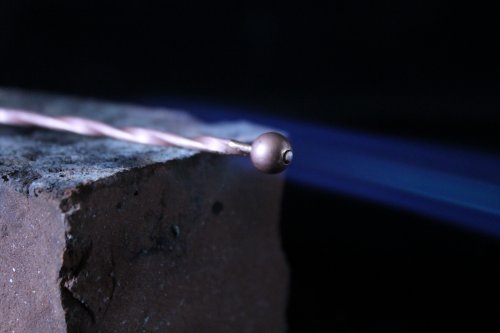
Step 13: Lay the wire assembly on the soldering brick and direct the flame directly at the bead. Once the piece is glowing red, touch the wire solder to the connections of the bead and wire.
Step 14: Allow the piece to cool and place it in pickle solution. Wash with soap and water.
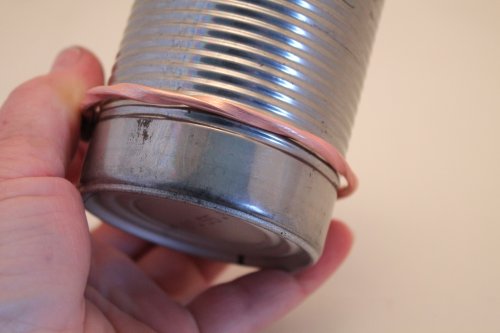
Step 15: Bend the bracelet around a soup can or bracelet mandrel.
Step 16: Wash the piece in soap and water again to remove any contaminants.
Step 17: Prepare Liver of Sulfur per manufacturer’s directions and apply to cuff. Wash again with soap and water.
Step 18: Using 400 grit sandpaper, remove some of the patina to highlight the twists.
Step 19: Wash in soap and water again, dry thoroughly and apply a spray sealant or Renaissance Wax.
Happy Wrapping!
![]()
Click to Receive Daily Tips by Email




0 comments