- NEW DVD Series – Stone Setting with Bezels
- Tube Set Charm by Kim St. Jean
- Prong Basket Pendant by Kim St. Jean
- NEW DVD Series – Stone Setting with Cold Connections
- New DVD Series – Stone Setting with Wire
- NEW DVD Series: Introduction to Stone Setting by Kim St. Jean
- Featured Tool: Bracelet Bending Plier
- NEW Dvd by Eva Sherman
- Fun, Fast Fold Forming DVD Series
- Double Band Ear Cuff from Alex Simkin
FREE Pattern: Twist and Shout Pendant
by Judy Ellis, Wirejewelry.com
Wire Jewelry Tip for June 6th, 2016
Twist and Shout Pendant
by Sarah Thompson
Today our FREE Pattern comes from our good friend, Sarah Thompson. If you love wire weaving – you will love this pendant pattern!
Sarah says:
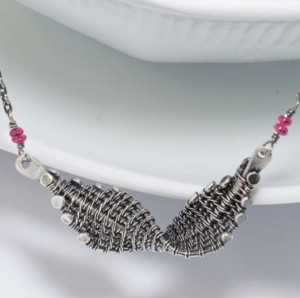
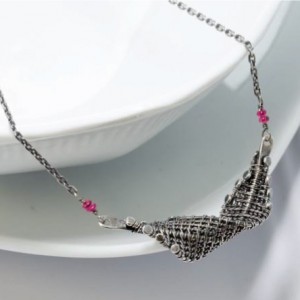
This is what your final pendant should look like.
Materials:
- 14g -6 inches dead soft wire, sterling silver, fine silver or copper
- 20g – 2 feet dead soft wire, sterling silver, fine silver or copper
- 28g – 8 feet fine silver wire or copper
- Practice wire in 18g and 28g
- Chain for your desired necklace length
- Clasp
- 24g wire or jump rings to attach the chain to the pendant
- Beads if you are making your own links to attach the chain. I like 2mm size
Tools:
- Round nose pliers
- Flat nose pliers
- Wire cutters
- Needle File
- Chasing Hammer
- 1.25 hole punch
- Painters Tape
- Ruler
- Permanent Marker
- Micro torch
- 12×12 tile or soldering board
- Locking tweezers
- Quenching bowl
- Liver of Sulfur
- 0000 Extra fine steel wool
- Brass bristle brush or tooth brush
Optional:
- Bandage Fabric Tape
- Bob-EEZ bobbins
The Weave:
Cut four 5 inch lengths of practice wire in 18ga. Use 30ga wire to weave with.
Left to Right:
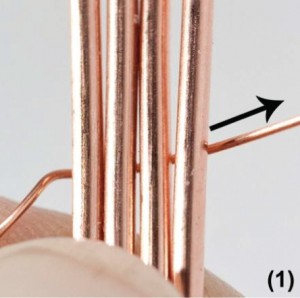
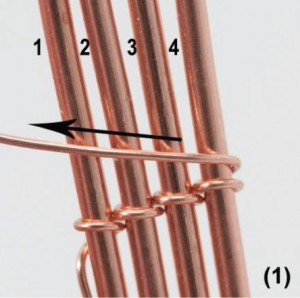
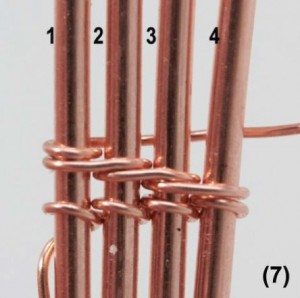
Step 1: We will start by weaving left to right. Leaving a 6 inch tail, bring the rest of your 30ga wire to the back of all four base wires.
Step 2: Thread the 30ga wire between wires 1 and 2.
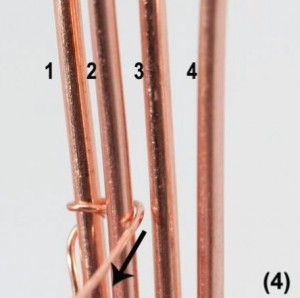
Step 3: Wrap the 30ga wire around wire 1, going clockwise, bringing the 30ga wire to the back of the base wires.
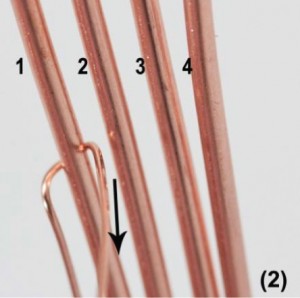
Step 4: Go to the right side of wire 2 and thread the 30ga wire between wires 2 and 3.
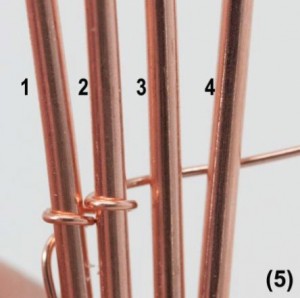
Step 5: Wrap the 30ga wire completely around wire 2, going clockwise, bringing the 30ga wire to the back of the base wires.
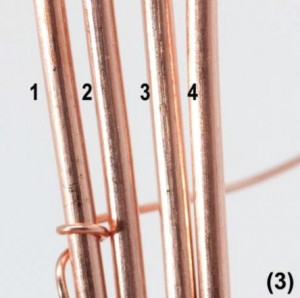
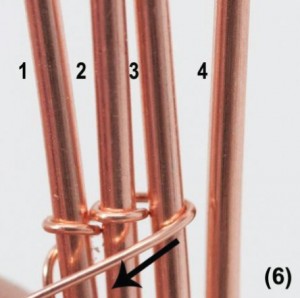
Step 6: Bring the 30ga wire to the right side of wire 3 and thread the 30ga wire between wires 3 and 4.
Step 7: Completely wrap around wire 3, going clockwise, bringing the 30ga wire to the back of the base wires once more.
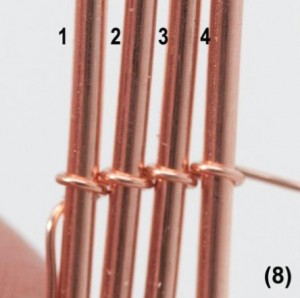
Step 8: Bring the 30ga wire to the right side of wire 4 and completely wrap around wire 4, going clockwise, bringing the 30ga wire to the back of the base wires once more.
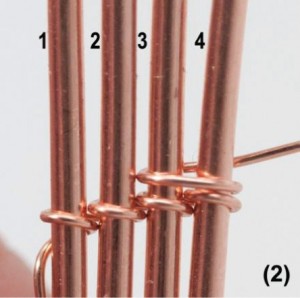
Right to Left:
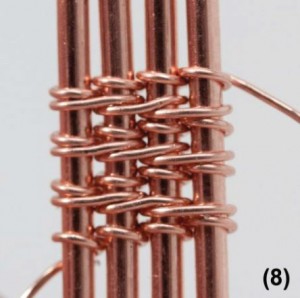
Step 1: You will now be weaving back across the front going right to left. Your 30ga wire should be in the back of wire 4, bring it to the front.
Step 2: Cross the 30 ga wire over the front of wires 4 and 3. Thread the 30 ga wire between wires 2 and 3.
Step 3: Wrap completely around wire 3 in a clockwise direction. Your wire should end up in the front on the right side of wire 3.
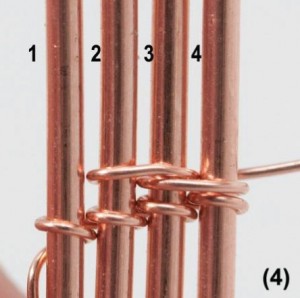
Step 4: Cross over the front of wires 3 and 2 with your 30ga wire. Thread your 30ga wire between wires 1 and 2. Completely wrap around wire 2 in a clockwise direction. Your wire should be in the front on the right side of wire 2.
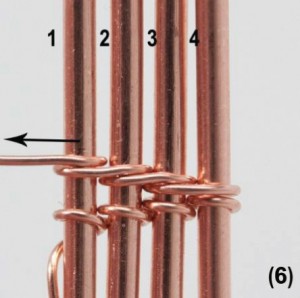
Step 5: Cross over the front of wires 2 and 1 with your 30ga wire.
Step 6: With your 30ga wire on the left side of wire 1, completely wrap around wire 1 in a clockwise direction. Your wire should be in the front on the right side of wire 1.
Step 7: You have now completed your row. Repeat the steps to the weave starting at the beginning, weaving LEFT to RIGHT by bringing your 30ga wire around to the back.
Preparation:
14g Wire -
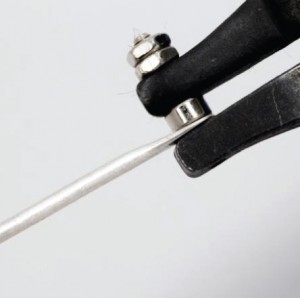
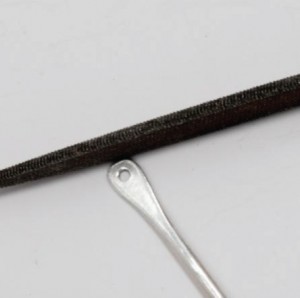
Cut: One-2 inch length, center marked Paddle both ends to 3.5mm, pierce the center of each paddle with a 1.25mm hole punch. Round the edges with a file. 20g wire.
20G Wire –
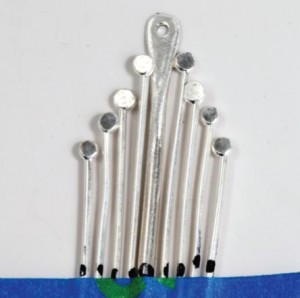
Cut: Two of each size- 2 inch, 1 ¾ inch, 1 ½ inch, and 1 ¼ inch lengths.
Step 1: Ball the ends with a micro torch. You want the balls to be smaller. Mark the centers and hammer the balls flat.
Step 2: Line up the prepped wires at the center marks; with the 20g on either side of the 14g wire. Going from longest to shortest.
Step 3: Tape together at the mark.
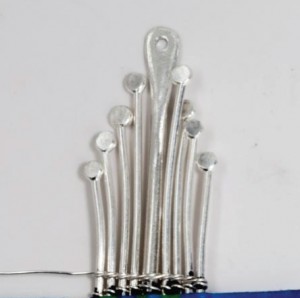
Step 4: Cut an 8 foot section of 28g wire.
Weave:
Step 1: Working 4 feet in slip the 28g wire between wires 1 and 2. Using the modified soumak weave, weave all 9 wires together.
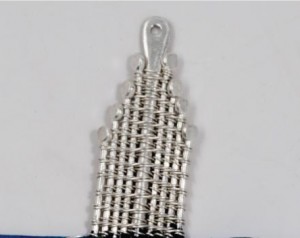
Step 2: After a few rows stop and rotate the balled ends so that they are perpendicular to the weave.
Step 3: Decrease your weave as you reach each balled end.
Step 4: Wrap three times around the last balled wire and trim.
Step 5: Remove the tape and finish the other half using the remaining 4 feet of 28g wire.
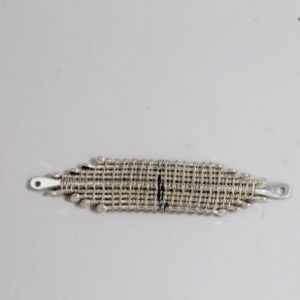
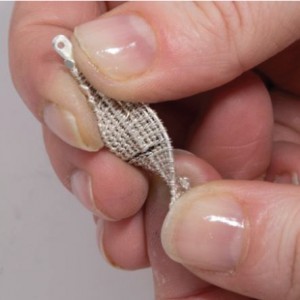
Step 6: Grip the top and bottom of your woven strip. Twist the 20g wire around the 14g wire to create a spiral. Don’t be afraid to use force, your fingers won’t damage the weave.
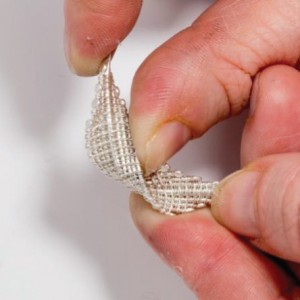
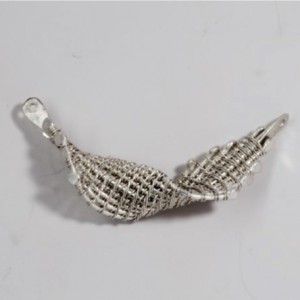
Step 7: With your fingers curve the ends of the 14g wire within the weave up, essentially folding the weave at the center.
Step 8: Attach the pendant to a chain using the holes punched in the 14g wire and beaded links or jump rings.
Congratulations! You’ve just made your first Twist and Shout Pendant!
Happy Wrapping!
![]()
Click to Receive Daily Tips by Email













Birgitte
October 26, 2016 at 7:32 am
I love Sarah’s work. Her instructions are very precise and easy to follow. However in this tutorial I noticed that there must be an error in the materials list. It states that 6″ of 14g wire is needed, but all I can see needed is 2″ unless the extra 4″ is to create the clasp. The 20g wire states that 2 feet is required, however again all I see is a total of 13″ required. Am I missing something?
Thanks.