Don't Miss
- NEW DVD Series – Stone Setting with Bezels
- Tube Set Charm by Kim St. Jean
- Prong Basket Pendant by Kim St. Jean
- NEW DVD Series – Stone Setting with Cold Connections
- New DVD Series – Stone Setting with Wire
- NEW DVD Series: Introduction to Stone Setting by Kim St. Jean
- Featured Tool: Bracelet Bending Plier
- NEW Dvd by Eva Sherman
- Fun, Fast Fold Forming DVD Series
- Double Band Ear Cuff from Alex Simkin
Simple Teardrop Pendant
By Judy Ellis on February 5, 2016
by Judy Ellis, Wirejewelry.com
Wire Jewelry Tip for February 5th, 2016
Simple Teardrop Pendant
by Sarah Thompson
Today we have a wonderful FREE pattern from Sarah Thompson. If you’ve just started learning to weave, this may be a great pattern for you!
Simple Teardrop Pendant
Designed by Sarah Thompson © 2014
Skill Level: Intermediate to Advanced
Materials:
- 16g fine silver, sterling silver, or copper wire – 9 inches
- 18g fine silver, sterling silver, or copper wire- 7
- 20g fine silver, sterling silver, or copper wire – 7 inches
- 28g fine silver, sterling silver, or copper wire- 11 feet
- 10mm lampwork bead
- Chain or cord
Tools:
- Ruler
- Wire cutters
- Permanent marker
- Bench block
- Chasing hammer
- Ring Mandrel
- 4mm dowel
- Needle files
- Painters Tape
- Liver of sulphur
- Steel wool
- Brass bristle brush or toothbrush
Instructions:
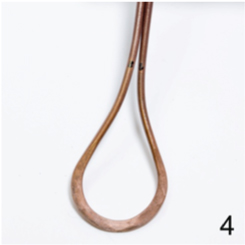
- Cut one 6 inch lengths of 16g wire, mark the center with a permanent marker. Line the center mark with the size 2 mark on your ring mandrel and shape the two wires around the mandrel, keeping the mark in the center of the curve. Cross the two arms an inch from the bottom of the curve and 2. Photo (2)
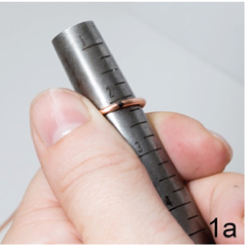
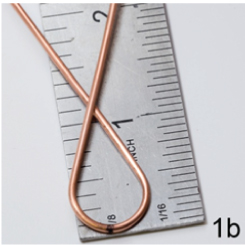
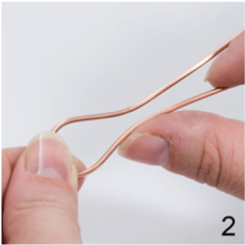
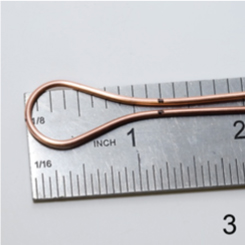
- With your fingers curve the two arms up where they cross so that the arms are parallel and touching each other.

- Mark the wires where they begin to touch; this should be about 1-1/4 inches from the bottom of the curve.
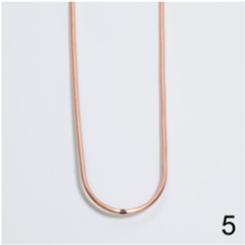
- With your chasing hammer flare out the curved sections of the wire. Photo (6)
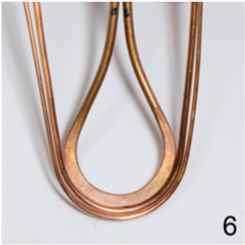
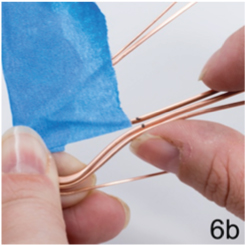
- Cut a 7 inch lengths of both 18g and 20g wire. Mark the centers of both wires. Shape the two 18g wires around the size 6 mark on your ring mandrel forming a U shape keeping the center mark in the center of the U. Repeat with the two 20g wires, shaping around the size 9.
- Take the 16g wire and place the 18g wire below it followed by a 20g wire. Adjust any curves needed so that all three wires nestle within each other. Tape the left side arms together. With your fingers shape the 16g and 20 g wire to the 14g wire so that all the wires are parallel.

- The Weave: Cut 11 feet of 28g wire; wind the wire around a bobbin leaving out 3 feet. Starting in the center of your shaped base wires, and working 3 feet in on your 28g wire, thread your wire between the 16g and 18g wire so that the 3 feet is coming towards you. Going clockwise wrap the 28g wire around the 16g wire, bringing the wire to the back.
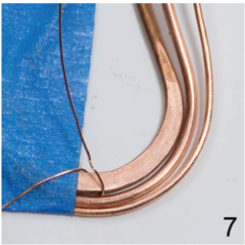
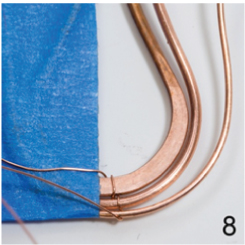

- Bring the 28g wire across the back of the 18g wire and thread between the 18g and 20g wires. Wrap the 28g wire around the 18g wire going clockwise so that you are once more in the back. Bring the 28g wire to the right of the 20g wire and wrap the 20g wire going clockwise.
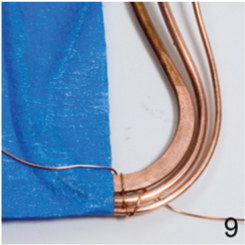

- Bring the 28g wire around to the front and cross over the 20g and 18g wires. Thread the 28g wire between the 16g and 18g wires. Going clockwise wrap around the 18g wire so you end up in the front.
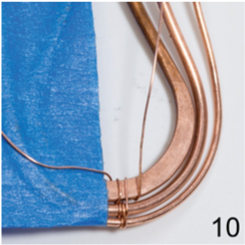
- Bring the 28g wire to the left of the 16g wire. Wrap around the 16g, going clockwise, bringing the 28g wire to the front. Bring the 28g around to the back, going clockwise.
- Thread between the 18g and 20g wires to wrap around the 18g wire. Continue this pattern of wrapping each individual base wire before going to the next base wires making sure you are wrapping tightly as you weave. Stop frequently to compress the weave down with your fingernails for a tighter compression.
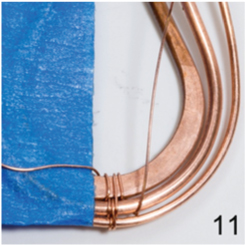
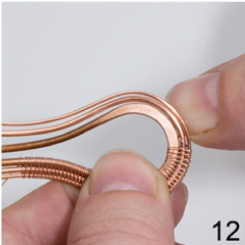

- Continue to weave up the right side until you come to your mark where the arms converge. Remove the tape and flip the woven form over. Shape the 18g and 20g wire to the 16g wire. Using the remaining wire on your bobbin continue weaving the other half of the form. Stop weaving when you come to the mark where the arms converge.
- Cut a 3 inch length of 16g wire (or the largest wire your bead will fit through). File one end flat and paddle the filed end. Round the paddled end with your files.
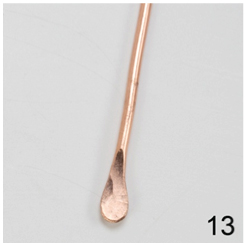
- Slip your bead onto the paddled 16g wire. Place wire between the existing 16g wires and center the bead within your form. You now have 7 wires to weave together. Using the wire on the bobbin continue the weave by crossing over the 16g wires to wrap around the 16g wire in the center, then continue on to the next wire. Weave all 7 wires together by wrapping each wire individually before going to the next wire.
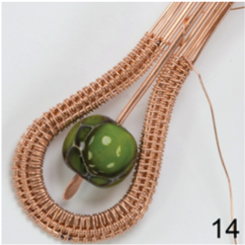
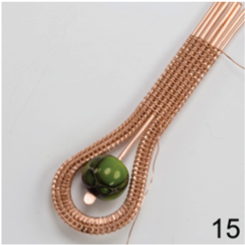

- Weave the 7 wires together for until you have a 1 inch section.
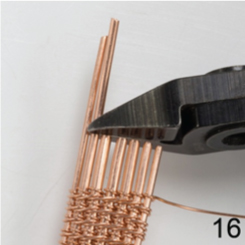
- Trim the base wires 1/4 of an inch above the weave.
- Coil the 28g wire around an 18g wire four times and trim your tails flush.
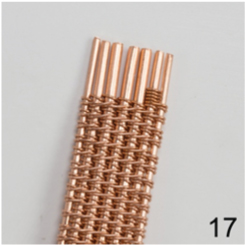

- Place a small dowel (I used a 4mm dowel) centered in the back of the 1 inch woven section. Fold the top of the woven section over the dowel and to the back of the weave. This is your bail. Compress the trimmed ends to the weave for a tighter fit. Slip your cord through and enjoy.
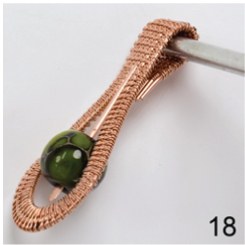
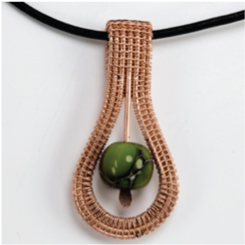
- Adjust your curves to accommodate different sized beads. For a more delicate look drop your base wire gauge sizes, for larger beads you can go up in size on your base wires. You can also torch the end of the wire that holds the bead instead of paddling the end.For fun try adding length to a few of your base wires and bring them to the front after folding over for some added decorations and swirls.If you would like Oxidize your finished pendant with some liver of sulfur and polish with #OOOO grit steel wool and a soft brass bristle brush.
- Congratulations! You’ve made your first Simple Teardrop Pendant
I hope that you’ve enjoyed this great pattern from Sarah. If you’d love to receive more like this SIGN UP HERE!
Happy Wrapping!
![]()
Click to Receive Daily Tips by Email


Mona
February 5, 2016 at 12:21 pm
Your instructions are somewhat confusing in that your list of wire gauges does not always correspond to the instructions and starts with 6g which I conclude you mean 16g. Also, when making the bail, how far down from the top end of the wires should the dowel be placed?
Judy Ellis
February 8, 2016 at 11:49 am
We’ve updated the gauge listing – there was an error. Thank you for letting us know. As far as the additional question about the bail, you might want to contact Sarah directly to see if she can give you further instruction on this pattern.
Dena Ellison
February 6, 2016 at 11:43 am
Having trouble with the weave. Would it be possible to post a video?
Judy Ellis
February 8, 2016 at 11:46 am
Unfortunately, we don’t have a video of this pattern. You might want to email Sarah directly and see if she can share something with you personally.
Jane Knutsen
July 11, 2016 at 7:28 am
The photos do not appear to be showing up in the tutorial! Is there a way to access the “how to” photos?
Judy Ellis
July 11, 2016 at 9:51 am
Hi Jane, We are having some technical issue with this post today. We will have it fixed later in the day. Thank you for letting us know and please check back.