- NEW DVD Series – Stone Setting with Bezels
- Tube Set Charm by Kim St. Jean
- Prong Basket Pendant by Kim St. Jean
- NEW DVD Series – Stone Setting with Cold Connections
- New DVD Series – Stone Setting with Wire
- NEW DVD Series: Introduction to Stone Setting by Kim St. Jean
- Featured Tool: Bracelet Bending Plier
- NEW Dvd by Eva Sherman
- Fun, Fast Fold Forming DVD Series
- Double Band Ear Cuff from Alex Simkin
Soldering Part 2
Just what the doctor ordered!
This article will go into depth about the 5 steps of soldering.
Step 1: Fitting
Soldering is much more challenging when the two or more pieces of metals to be connected together do not make a fitted “join”; fitted join meaning the smooth, built-in or even point of connection with the other. The edges that will be soldered together must have a fitted match to ensure a secure and lasting bond. In order to do this, filing may be necessary. Make sure that the surfaces are free of dents, warping, and kinks. If joining two flat edges together (butt join), it is recommended to bevel the surfaces so that the metal or wire is overlapping the other. This will allow for a strong joint.
Step 2. Cleaning
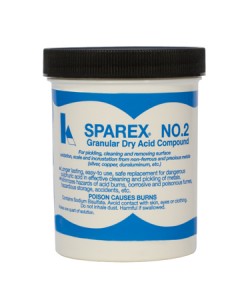
It is important that your metals are clean, and free of dirt, grease, and oil. This is because solder will not flow on an unclean surface. Unclean surfaces include those with fingerprints! Cleaning can be accomplished by pickling or sanding. Pickling, a chemical process, is very effective. In order to clean the metals using this method the following items are needed: pickle, pickle pot, tongs, and tweezers. Pickle is an acidic solution and can come in a liquid or powder form. As for the pickle pot, an old coffee pot on top of a hot plate or small crock pot will suffice. Once you designate your equipment as a pickle pot, it should never be used for cooking or brewing again. After pickling, the metals need to be washed thoroughly in water with a little baking soda (a copper tong should be used to take the metals in and out of the pot–copper will not contaminate the pickling solution). Dry well. 
A wet pumice stone and bristle brush or a clean piece of emery paper will also work for cleaning. Use a clean pair of tweezers to manage the metals with after they have been cleaned.
Step 3. Fluxing
All areas to be soldered need to be covered with flux (unless using paste solder). Each piece of solder should also be fluxed. Soldering flux helps dissolve and prevent oxidation of the base metal. It also acts as a wetting agent allowing easier spreading of the solder around the join. There are many soldering fluxes on the market available for use.
Step 4. Solder Placement
Prepare a few snippets of solder; these are called pallions. With a pair of tweezers or a flux-moistened brush tip, place the solder pallion on the join. Do not use more pallions than necessary for the join, as it is difficult to melt and remove as well as causing blemishes. If excess solder does flow off the join, it can be removed by filing.
Step 5. Heating
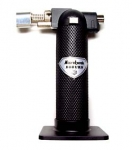
Using a torch, carefully and quickly preheat the entire metal area evenly to provide solder flow. If the solder is heated without heating the entire piece first, it melts and forms a ball that cannot enter the join. Equally heat the two or more pieces that are to be connected together. Once the piece begins to glow, the solder will flow and will fill the seam. Working in soft light will increase your capability to see the metal glow. Melted solder is attracted by heat and will always flow toward the hottest spot. By moving the torch, you can target the solder to flow in the manner you desire.
After the solder has melted to your satisfaction, cool, and place the piece in a warm pickle bath to remove oxidation. It can also be boiled to increase the cleaning time.
For instructions and more on how to solder, see our Metalworking DVD’s featuring Patti Bullard!


Tina
February 14, 2011 at 1:06 pm
Fantastic – am learning something new everyday. We at Tiny Gemstones had been thinking about going this route for sometime and finally got around to, following this blog, investing in the soldering equipment. It is working out a treat and along with the tips we’ve had from the tips at wire-sculpture.com for making a lightbox and taking clearer pictures this has now added to our repertoire and we’re truly grateful
Tina and Nisha