- NEW DVD Series – Stone Setting with Bezels
- Tube Set Charm by Kim St. Jean
- Prong Basket Pendant by Kim St. Jean
- NEW DVD Series – Stone Setting with Cold Connections
- New DVD Series – Stone Setting with Wire
- NEW DVD Series: Introduction to Stone Setting by Kim St. Jean
- Featured Tool: Bracelet Bending Plier
- NEW Dvd by Eva Sherman
- Fun, Fast Fold Forming DVD Series
- Double Band Ear Cuff from Alex Simkin
Free Pattern: Let’s Dance Earrings By Tracy Stanley
by Judy Ellis, Wirejewelry.com
Wire Jewelry Pattern for July 20th, 2017
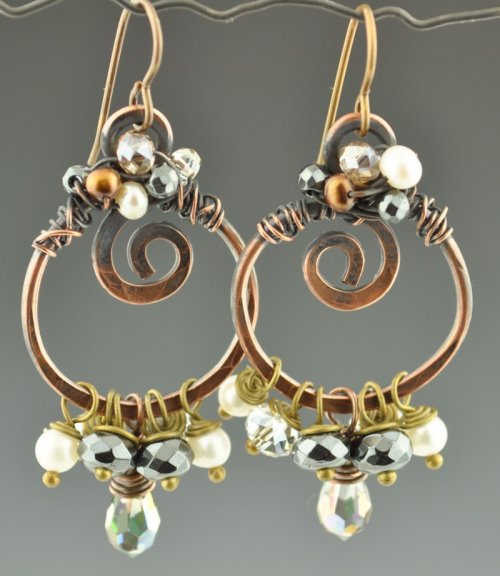
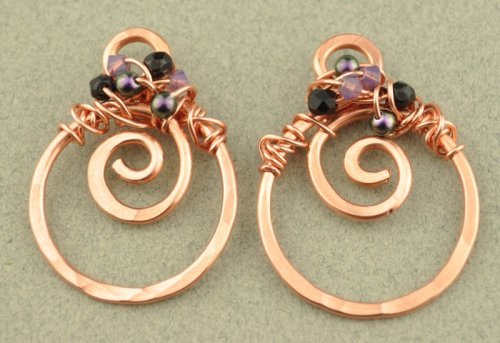
Let’s Dance Earrings
by Tracy Stanley
Earrings! A girl can never have too many!!
These fun earring will make you want to dance every time you wear them!
These earrings use about 12 beads for each. Go through your stash and pick some favorites of yours, 3mm – 4mm for the tops and 4mm – 6mm for the dangles.
Materials:
- 14 Gauge Round Dead Soft Copper Wire (Pattern Quantity 10 Inches, Product ID: H11-14D)
- 22 Gauge Round Dead Soft Copper Wire (Pattern Quantity 2 Feet, Product ID: H11-22D)
Tools:
- Chain Nose Wire Plier (Pattern Quantity 1 Piece, Product ID: G2-508)
- Round Nose Wire Plier (Pattern Quantity 1 Piece, Product ID: G2-507)
- Flat Nose Wire Plier (Pattern Quantity 1 Piece, Product ID: G2-506)
- 5 inch Plato Slim Flush Cutters for Wire Working or Beading – Pack of 1 (Pattern Quantity 1 Piece, Product ID: G35-3)
- Flat Face Chasing Hammer with Wood Handle – Economy (Pattern Quantity 1 Piece, Product ID: G3-14)
- Premium Steel Bench Block 2 1/2 X 2 1/2 (Pattern Quantity 1 Piece, Product ID: G17-9)
- 6 Inch Metal Ruler – in Inches And Centimeters (Pattern Quantity 1 Piece, Product ID: G7-7)
- 14mm Barrel Wrap N Tap Looping Pliers for Pattern Wire, Etc. (Pattern Quantity 1 Piece, Product ID: G2-79)
Directions:
Step 1: Let’s get started…..
• Cut 2 pieces of 14g wire 5” long.
• Make sure both ends are flush cut.
• Using fine tip marker, mark 3/4” from one end.
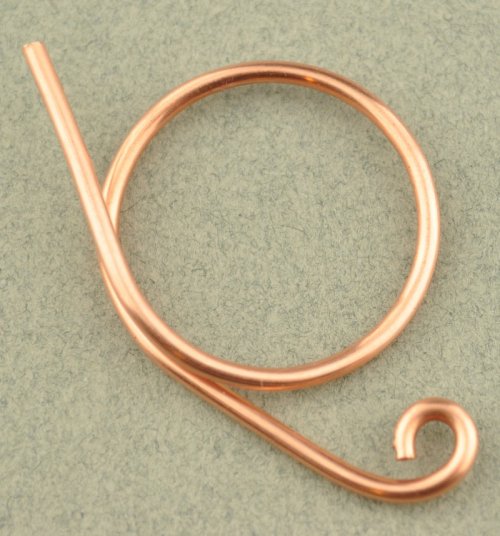
• Place this wire at the 3/4” mark the Wrap and Tap plier on the large barrel.
• Make a complete loop. Make sure that the short end stays on the handle end of the pliers.
• End when the wire is pointing away from the other end as in photo.

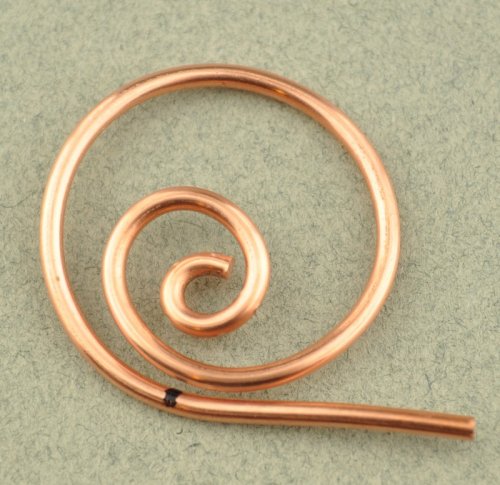
Step 2: • Using round-nose pliers, make a loop on the longer end. This loop should be turned towards the large loop.
• Then use chain-nose pliers to finish off the small spiral that will sit in the large loop. This is done by grabbing the small loop with the tip of the pliers and turning the wire towards the center of the loop.
• Repeat on the other wire.
• Compare spirals and make any adjustments in the size or space in-between the spiral.
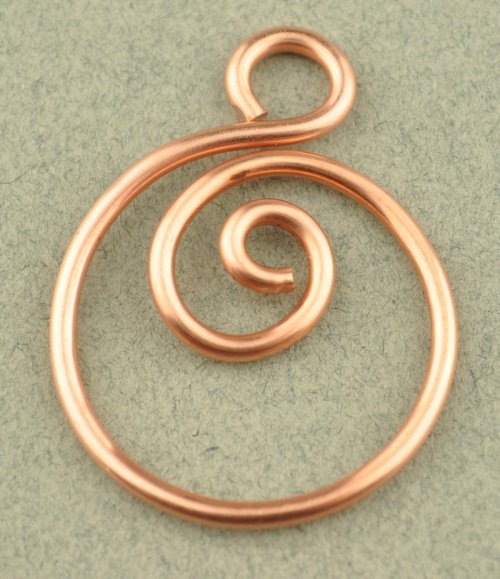
Step 3: • Use round-nose pliers to make loop with the short wire. Grab the end of the wire with the round nose and turn wire toward the 3/4” mark.
• The loop should sit on top of the spiral.
• Repeat on the second one and make any necessary adjustments.
Step 4: You will want your earrings to go in opposite directions. Make sure that you decide which is the front side of each before taking the next step.
Use chasing hammer to flatten. Make sure you are striking from the front side.
TIP: If you are making more than one pair at a time, use a jump ring to attach the matched pairs at this point. This way you won’t get the pairs mixed up!
Step 5: Now time to dress it up!
You will need 22g wire and 6 or more beads 3-4mm in size.
• Cut a piece of 22g wire a ft long.
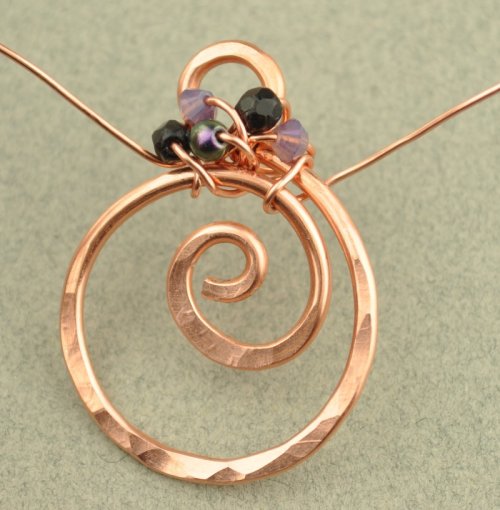
• Starting in the center of the 22g wire wrap the around the top loop a couple of times.
• Add a bead and wrap again.
• Repeat until you are happy with the cluster of bead.
• With the left over wire on both ends, wrap around the outside loop. This can be a tight coil or an open wrap that over laps itself.
Repeat on the other piece.
Step 6: • Antique both pieces
• Highlight and polish
I prefer to antique before putting on the dangle beads as it is easier to clean and polish.
Step 7: Next…the party on the bottom….
• Place 8mm bead on head pin.
• Make a loop using round nose pliers.
• Put loop on the bottom of earring
• Wrap loop closed around the base of the loop and go to top of the bead.
• Then add 3 or more beads on both sides of this 8mm bead.
• Repeat on the second earring.
What’s next?? Put the ear wires on and hit the dance floor!!
Happy Wrapping!
![]()
Click to Receive Daily Tips by Email





0 comments