- NEW DVD Series – Stone Setting with Bezels
- Tube Set Charm by Kim St. Jean
- Prong Basket Pendant by Kim St. Jean
- NEW DVD Series – Stone Setting with Cold Connections
- New DVD Series – Stone Setting with Wire
- NEW DVD Series: Introduction to Stone Setting by Kim St. Jean
- Featured Tool: Bracelet Bending Plier
- NEW Dvd by Eva Sherman
- Fun, Fast Fold Forming DVD Series
- Double Band Ear Cuff from Alex Simkin
How to Make a Bead Link
by Judy Ellis, Wirejewelry.com
Wire Jewelry Tip for December 2nd, 2016
How to Make a Bead Link
by Marilyn Gardiner
Today we have a great tip on how to make a simple Bead Link. Enjoy!
Marilyn Says:
Why would you want to make one? Well, bead links are great components for making jewelry, especially necklaces.
What is a Bead Link?
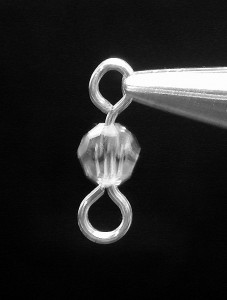
A bead link is a length of wire that holds one or more beads, and has a loop at each end. The wire could be rigid wire, or flexible beading wire. Here are some tips for making the kind with rigid wire—and here are two examples.
A bead link can be the center focus of a necklace, or it can be repeated and alternated with sections of chain mail.
Let’s make one!
- First – decide on the bead or beads you want on each link. Because this rigid wire link is not going to be flexible, I suggest maximum length of 2-3 inches. (You will be able to curve the links a bit if you need to.)
- Second – decide on the thickness (gauge) of the wire you plan to use to make the bead link. Small, delicate beads may use 22-24 gauge (AWG) wire, while heavier beads will require 18-20 gauge.
Use an inexpensive length of craft wire of the same gauge to play with your beads and come up with just the right combination before you go to the work of cutting a length of your “good” wire, adding the beads, and then forming the links at each end. Think about adding small spacer beads beside or between your more important beads. Metal beads are good choices for spacers—consider round, donut, or saucer shapes.
- Third – decide on the type of loops you want to add at each end of the link. (The loops allow you to connect to your chain mail sections.) Will it be a simple loop, a double loop, or a wrapped loop? When you decide, make some practice ones with your craft wire. When you have a loop you like, unroll it and measure how much wire it consumed.
- Next – decide on the length required for your “good” wire. Measure the length of wire needed for your beads, and then add on the amount for two loops. (If making wrapped loops, add a bit extra wire that will be trimmed at the end.) I recommend that you test this length with craft wire prior to cutting the “good” wire.
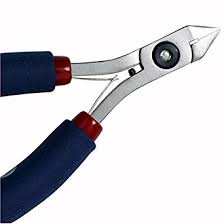
You now know exactly how much and what gauge of wire you need for your bead link. Set out your good wire and a good pair of flush cutters for jewelry.
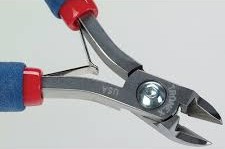
These cutters have one flat side ( photo below)
And one beveled side.
You want your length of wire to have a flat edge at both ends. Take your coil of wire, and check the first end. If it isn’t flat, cut a small bit off to make it flat—or else you can file it flat.
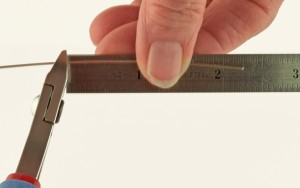
- Finally – take a metal ruler that has flat ends, and numbers that start right at the edge. Let’s say you want a 4″ length—set the cut end of the wire at 4 inches, hold it in place with one hand, and use the cutters in your other hand to snip the wire right against the end of the ruler—making sure you are using the flat-cutting edge.
- Make a loop at one end, add your beads, make the second loop. Done!
Here is a photo of a sample necklace with bead links and chain mail components made from Parallel weave (Helm chain).
If you love this tip and would like to read more of Marilyns’s contributions – CLICK HERE!
Happy Wrapping!
![]()
Click to Receive Daily Tips by Email





0 comments