


- NEW DVD Series – Stone Setting with Bezels
- Tube Set Charm by Kim St. Jean
- Prong Basket Pendant by Kim St. Jean
- NEW DVD Series – Stone Setting with Cold Connections
- New DVD Series – Stone Setting with Wire
- NEW DVD Series: Introduction to Stone Setting by Kim St. Jean
- Featured Tool: Bracelet Bending Plier
- NEW Dvd by Eva Sherman
- Fun, Fast Fold Forming DVD Series
- Double Band Ear Cuff from Alex Simkin
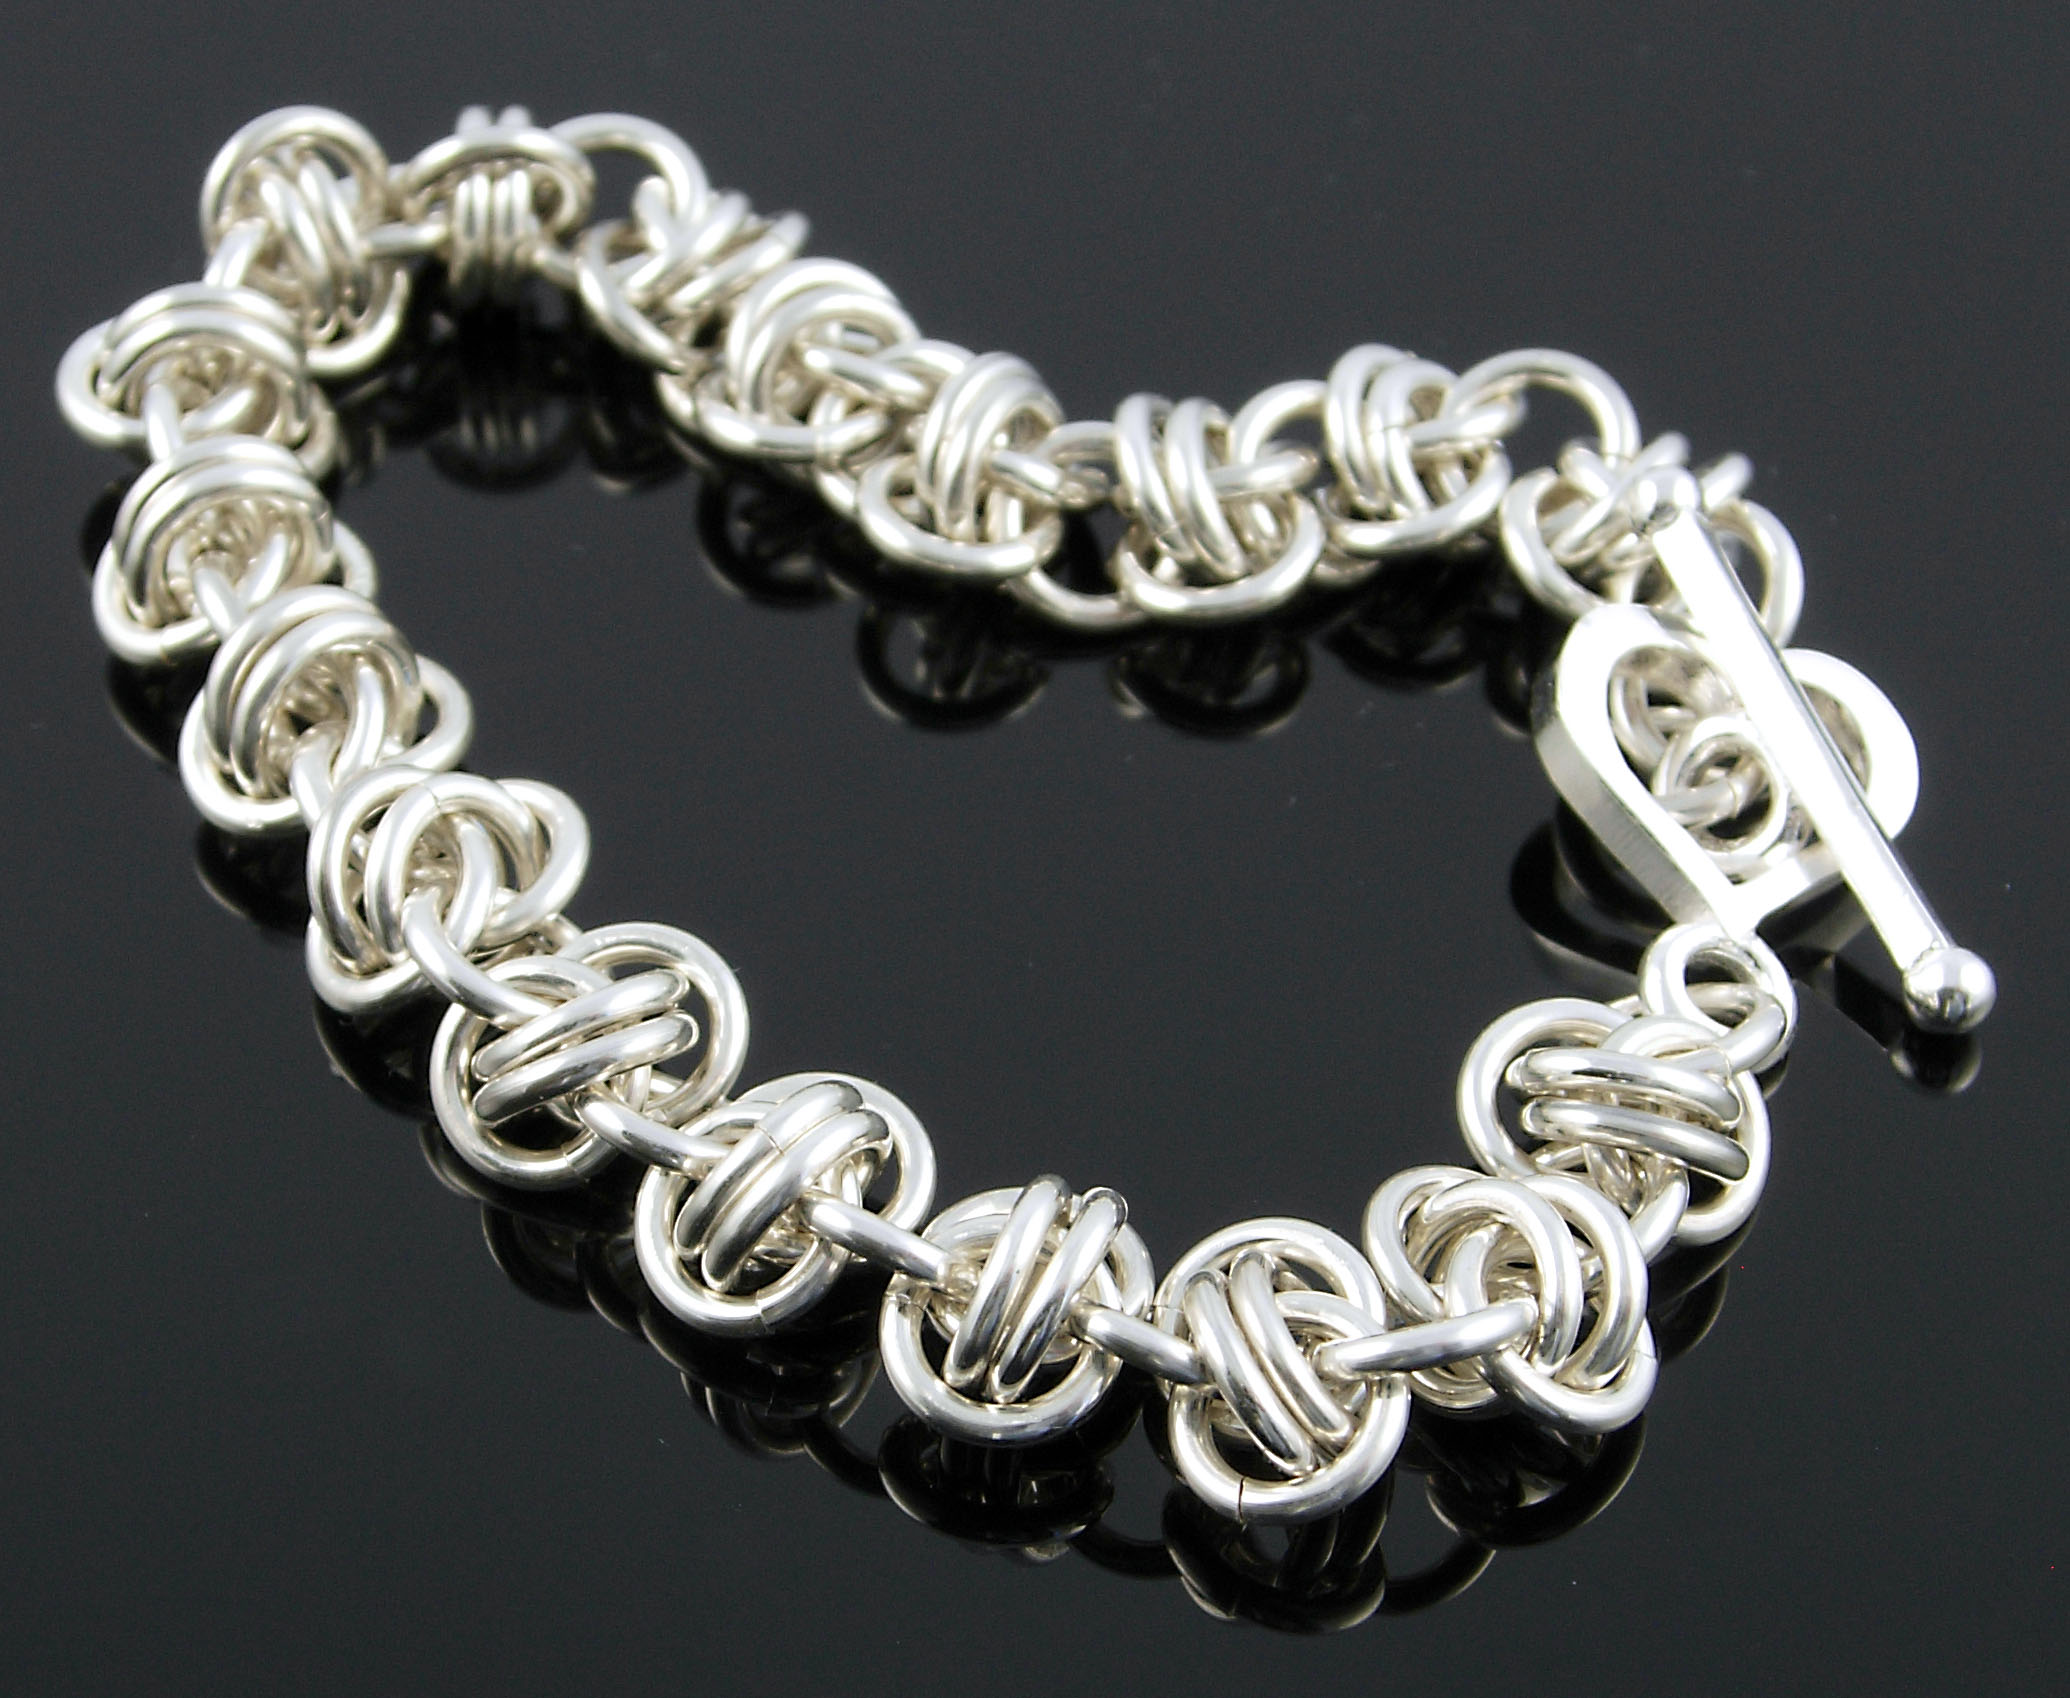
FREE Pattern: Barrel Weave Bracelet

by Judy Ellis, Wirejewelry.com
Wire Jewelry Pattern for November 9th 2016
Barrel Weave Bracelet
by Marilyn Gardiner
Today we feature a new chain mail pattern from Marilyn. I know you will love this simple yet elegant pattern. Enjoy!
Marilyn Says:

This weave is attributed to Susan Richards and appears on the wetcanvas.com forum and the mailleartisans.com website.
Each segment uses 5 jump rings
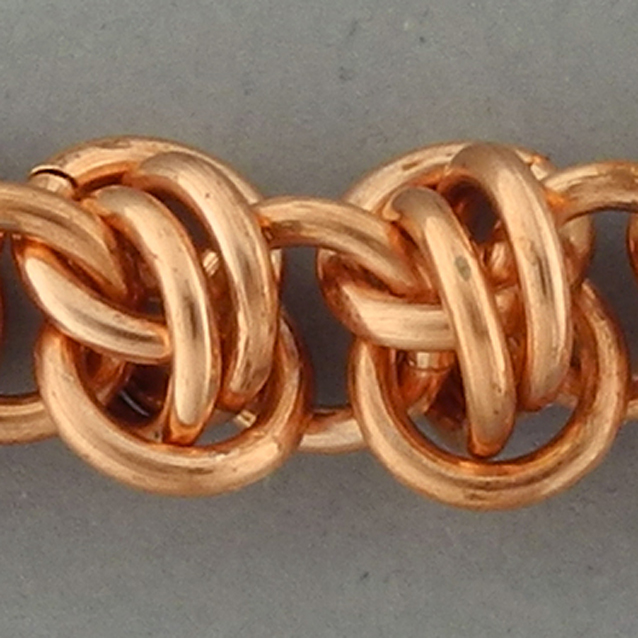
2 Barrel Weave Segments
Materials:
- For this bracelet I used AWG (American Wire Gauge) jump rings, made from round wire. The following ring sizes will work with sterling silver, silver filled, copper, or Jeweller’s Bronze.
- 16 gauge, 4.5 mm ID rings (130)
- 16 gauge, 3 mm ID rings (4) to attach the clasp
- 1 matching toggle clasp
Strategy: Plan of Action -
- Make the main chain
- Attach the toggle clasp
- Make adjustments
- Explore and experiment
Make the Chain
The bracelet is built with Barrel weave segments.
- Follow steps 1-6 for one segment.
- Steps 7-10 add the second segment.
- Continue to add segments for your bracelet. (25 barrels make a 9″ bracelet.)
- End the chain with a 4.5 mm ring.
There are 3 segments per inch – plus you have to allow for the length of the clasp you plan to use. The number of jump rings in the Materials List makes a chain that is 8.5″ in length.
Attach the Toggle Clasp
The Ring Part:
Our goal is to have the ring part of the clasp lay flat when it’s attached to the chain.
- First, notice the orientation of the small ring on ring part of your toggle: is it parallel to the toggle, or does it stick up at a 90 deg. angle? If it’s parallel, you’ll need to use one of the small 3mm jump rings to attach the clasp.
- Remove the paper clip or twist tie from the beginning of the chain.
- If your clasp had a parallel small ring, open that end ring, add on the small ring of the clasp, and close the end ring.
- If your clasp has a parallel small ring, open a 3mm small jump ring, add on the small ring of the clasp, and the end jump ring of the chain. Close that ring.
The Bar Part:
- At the other end of the bracelet, add three of the 3mm jump rings, linked in a series, to the end ring of the chain.
- Add the “bar” part of the toggle into the end ring.
- This series of jump rings acts as a shank, allowing the bar to fold sideways and be inserted through the ring part of the toggle.
Make Adjustments
You may need to add or remove barrel segments once you try on the bracelet for fit. (The clasp will add about an inch to the bracelet.)
Explore and Experiment
Experiment with other metals and colors of jump rings.
- For example, the pairs of rings in the center of each barrel could be different from the other rings.
- Try it in a necklace length. You could alternated bead links or metal links with sets of 3 or 5 or 7 barrels.
- Make 2 or 3 segments for an earring. Use a small ring to add the ear finding. Add a drop bead or crystal.
Instructions:
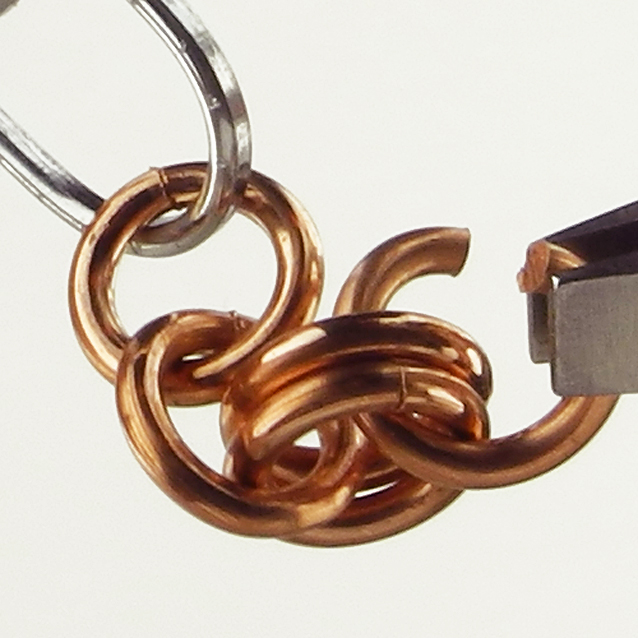
Step 1: Prepare several rows of 5 rings, each with 3 open and 2 closed.
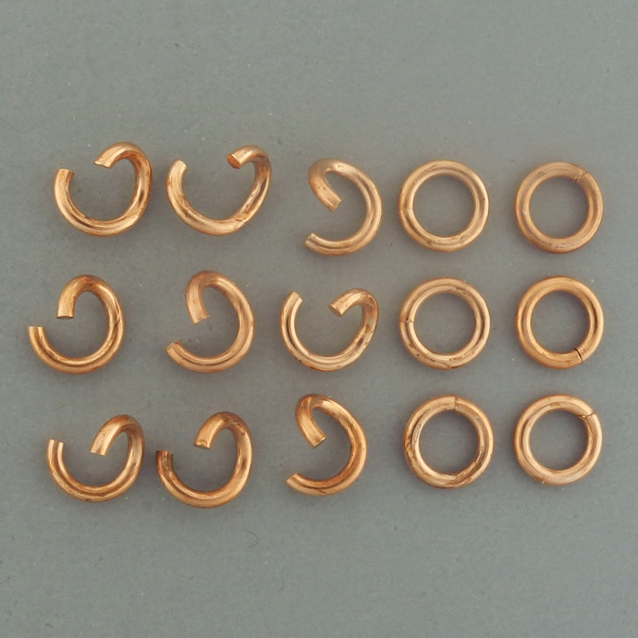
Make sets of 3.
Step 2: Hold one open ring with the pliers, add 2 closed rings, and close the ring (red dot).
Repeat to prepare more sets of 3 rings.
Each set of 3 will use 2 more rings to connect it to make the barrel chain.
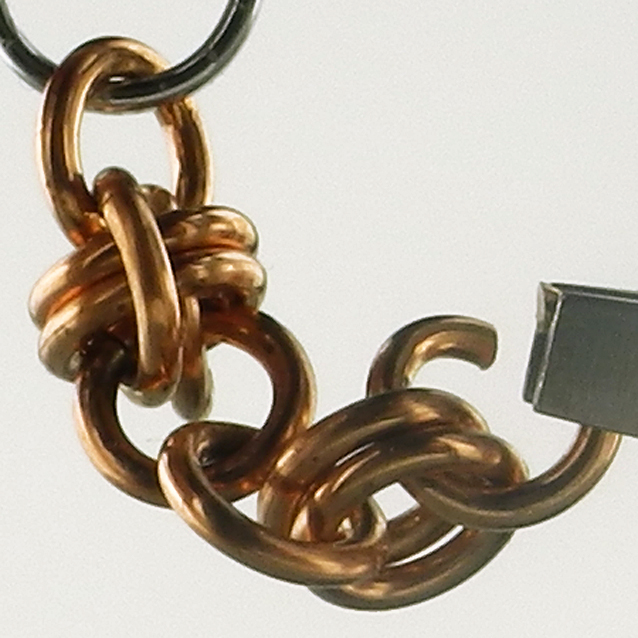
Make the First Segment:
Step 3: Pick up another open ring and insert it through the single ring (red dot) of a set of 3 rings and through a large paperclip or twist tie.
You now have a short chain of 1 ring – 1 ring – 2 rings attached to a handle.

Step 4: Take an open ring, put it through the end pair and hold it there with your pliers.
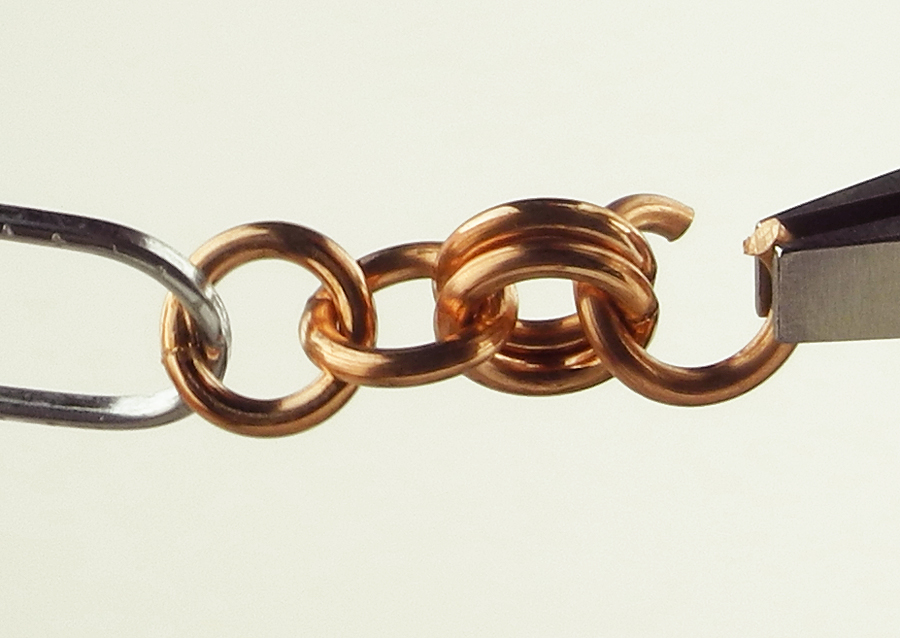
Step 5: Use your other hand to lift the chain upward, with ring #1 tipped away from you (very important).
Step 6: Moving from front to back, hook ring #5 through ring #1.
Close the ring.

Make the Second Segment:
Step 7: Insert an open ring through the sides of the 2 horizontal rings of the previous segment, and then through the single ring of a set of 3 rings.

Step 8: Close the ring

Step 9: Repeat steps 4-6, inserting an open ring through the end pair of rings…
Step 10: …and then front to back through the first ring of the segment (red dot).
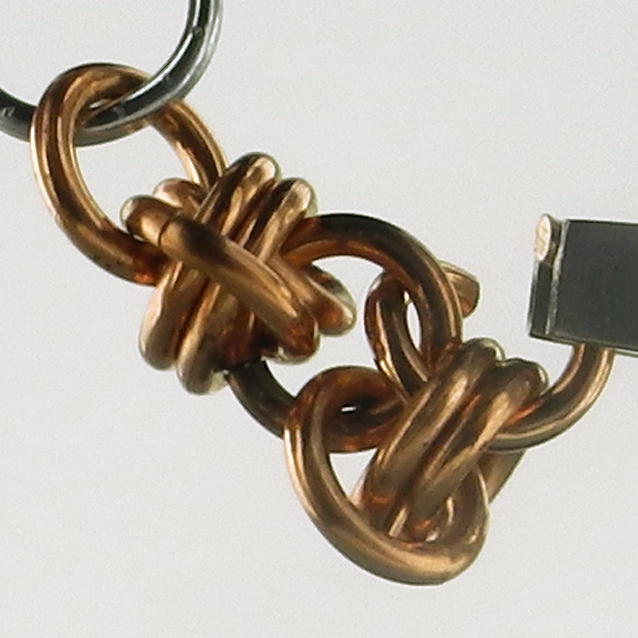
Step 11: Here are the first two completed segments.
Repeat steps 7 to 10 to make additional barrels.
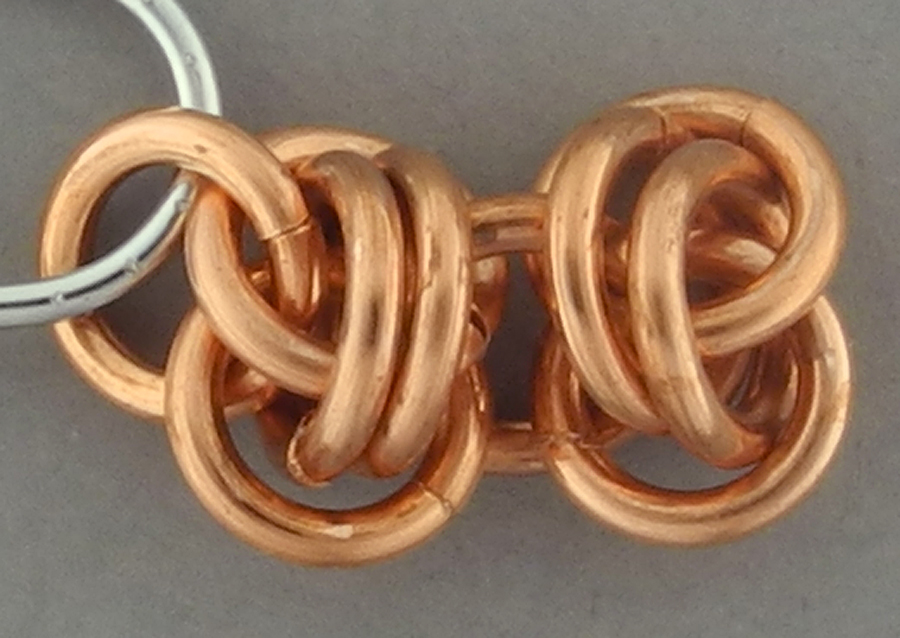
Finish the chain with a single ring through the sides of the last pair of horizontal rings. It will match the very first ring attached to the paperclip.
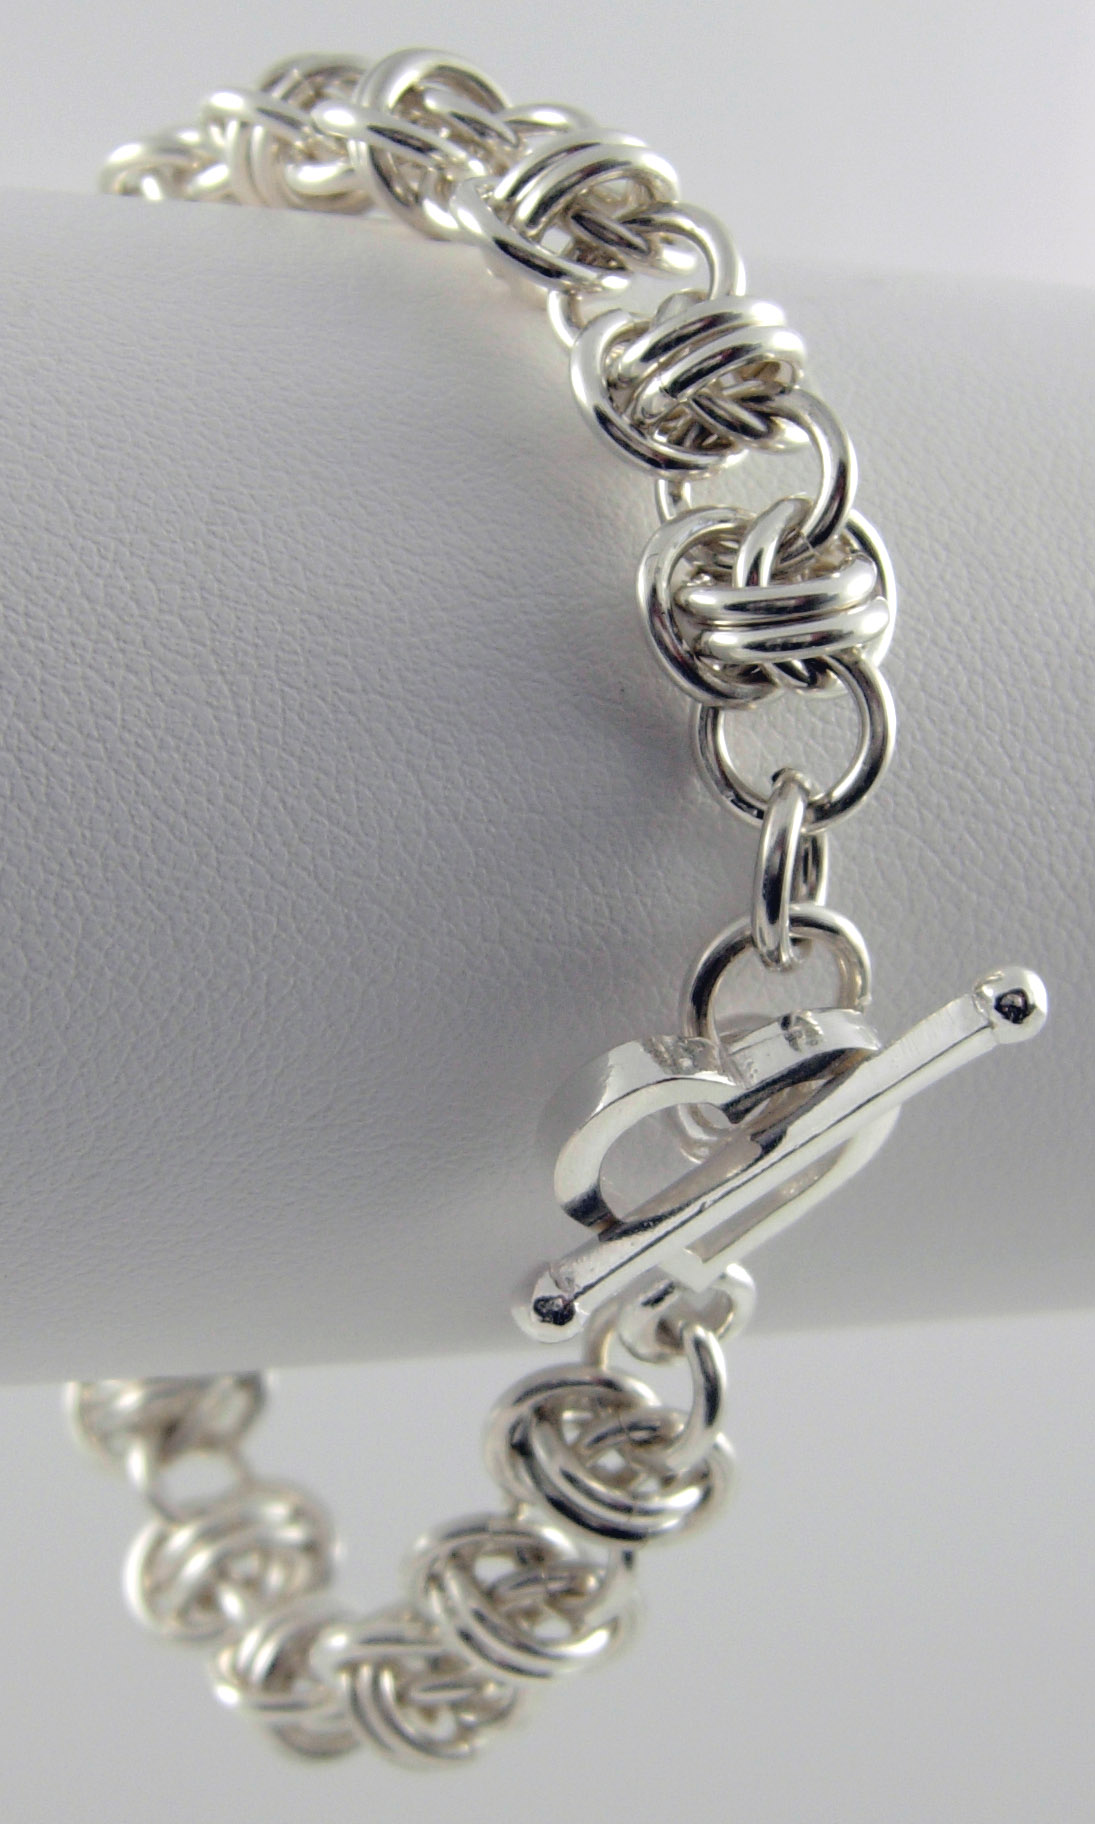
Congratulations! You’ve made your first Barrel Weave Bracelet!
I hope you’ve enjoyed this pattern. For more of Marilyn’s tips – CLICK HERE!
Happy Wrapping!
![]()
Click to Receive Daily Tips by Email
Related Posts


Wire Jewelry Ideas
-
 See Yourself as a Creative Thinker-Part IV By Karen Meador, PhD
Wire Jewelry Article for September 27th, 2017 If...
- September 27, 2017
-
 See Yourself as a Creative Thinker-Part III By Karen Meador, PhD
Wire Jewelry Article for September 20th, 2017 If...
- September 20, 2017
-
 See Yourself as a Creative Thinker-Part II By Karen Meador, PhD
Wire Jewelry Article for September 13th, 2017 If you...
- September 13, 2017
-
 See Yourself as a Creative Thinker By Karen Meador PhD
Wire Jewelry Article for September 6th, 2017 This is...
- September 6, 2017

Design & Inspiration
-
 Free Pattern: Smile Cluster Necklace by Karen Meador
by Judy Ellis, Wirejewelry.com Wire Jewelry Pattern for August...
- August 7, 2017
-
 Free Pattern: Long crystal round maille earrings by Kylie Jones
by Judy Ellis, Wirejewelry.com Wire Jewelry Pattern for August...
- August 3, 2017
-
 Free Pattern: Stone Twist Wrap by Karen Meador
by Judy Ellis, Wirejewelry.com Wire Jewelry Pattern for July...
- July 31, 2017
-
 Free Pattern: Floating Bead Earrings By Kimberly Newman
by Judy Ellis, Wirejewelry.com Wire Jewelry Pattern for July...
- July 27, 2017
Featured Tools
-
 Get to Know Your Hand Tools – Tube-Cutting Jig By Helen I. Driggs
by Judy Ellis, Wirejewelry.com Wire Jewelry Tip for August...
- August 4, 2017
-
 Wire Jewelry Video: Using Punch Pliers by Judy Freyer Thompson
by Judy Ellis, Wirejewelry.com Wire Jewelry Tip for August...
- August 2, 2017
-
 Wire Jewelry Video: Aligning a Hole Punch by Judy Freyer Thompson
by Judy Ellis, Wirejewelry.com Wire Jewelry Tip for July...
- July 26, 2017
-
 Get to Know Your Hand Tools – Wire Cutters – Helen I. Driggs
by Judy Ellis, Wirejewelry.com Wire Jewelry Tip for July...
- July 25, 2017
0 comments