- NEW DVD Series – Stone Setting with Bezels
- Tube Set Charm by Kim St. Jean
- Prong Basket Pendant by Kim St. Jean
- NEW DVD Series – Stone Setting with Cold Connections
- New DVD Series – Stone Setting with Wire
- NEW DVD Series: Introduction to Stone Setting by Kim St. Jean
- Featured Tool: Bracelet Bending Plier
- NEW Dvd by Eva Sherman
- Fun, Fast Fold Forming DVD Series
- Double Band Ear Cuff from Alex Simkin
Free Pattern: French Hook Ear Wires
by Judy Ellis, Wirejewelry.com
Wire Jewelry Free Pattern for July 18th, 2016
French Hook Ear Wires
by Judy Larson
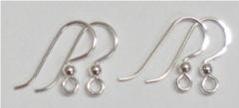
Today we share another great pattern from our good friend Judy Larson! These simple and yet lovely French Hook Ear Wires are so versatile and look great with so many projects!
Judy says:
Make perfect ear wires every time with your 6 Step Barrel Pliers. The back wire is a bit longer than the average earwire so you do not have to worry about it slipping off your ear.
Materials:
- 20 or 21 gauge half hard round wire Hint: If you only have dead soft wire, just twist it to harden it. Hammering will also harden it.
- Optional: Two 3mm round metal beads
Tools:
- Flat nose pliers
- 6-Step barrel pliers
- Flush cutter
- Cup bur
- Optional: Hammer and bench block
Instructions:
Note: For the purposes of this tutorial, the 6 plier steps have been labeled in ascending order. These numbered steps will be referred to and where possible, mandrel sizes will be given as well. It is important to read through the directions before starting.
Step 1: Straighten and flush cut both ends of two 1-7/8″ pieces of 20 or 21 gauge wire for each pair of earrings.
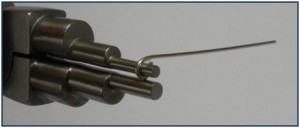
Step 2: Make an eye on one end of each wire using Step 1 (or 3/32″ mandrel) of the 6 step barrel pliers.
Step 3: If adding a bead, shift the eye around the pliers as shown so you can bend the wire tail back to center the eye on the wire end.
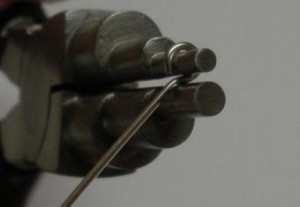
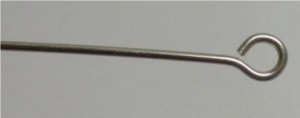
Step 4: Slide a bead on each wire. Push the bead tightly to the eye. Holding the tip of the flat nose pliers tightly to the bead, make a 70 degree bend in each wire. Note: Decide if you want the eye hole to thread from side to side (shown) or front to back and place it in the pliers accordingly.
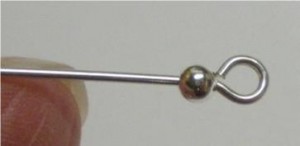
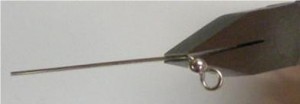
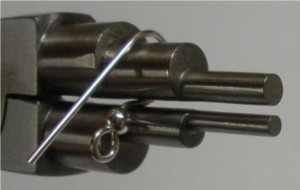
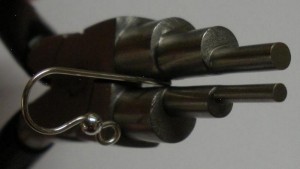
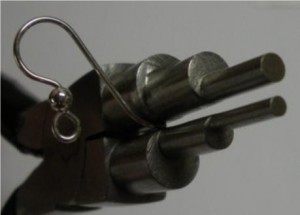
Step 5: Pushing the bead tightly against the 6 step barrel pliers, grip one wire between Step 3 and Step 4 (or ¼” mandrel). Push the wire up, over and down around Step 4 (or ¼” mandrel).
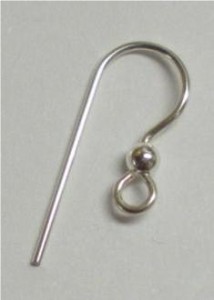
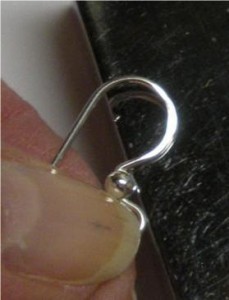
Step 6: Grip the earring tip between Step 5 and 6 of the 6 step barrel pliers. Make a slight bend in the tip using Step 6 (or scant 3/8″ mandrel).
Step 7: Use a cup bur to smooth the cut end of each earring.
Step 8: Optional: Lightly hammer the front of the earring curve.
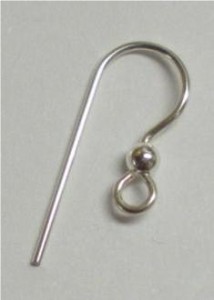
Congratulations! You’ve made your first set of French Hook Ear Wires.
If you’d like to see more from Judy you can see her blog posts HERE!
Happy Wrapping!
![]()
Click to Receive Daily Tips by Email







Malibu
July 18, 2016 at 7:21 pm
Great tutorial! Thank you!
Ron
August 7, 2016 at 2:42 pm
Thank for the tutorial! In the photos in Step 6 and Step 7 Can you add a photo showing the small bend in at the end of the ear wire? We see a great view of the de burred wire tip, but should we de-burr before making the bend at the end or after?
Judy
September 10, 2016 at 12:33 pm
Check the photo after Step 8 to see the bend at the end of the ear wire. As for when to use the cup bur, either before or after the bend is fine.