- NEW DVD Series – Stone Setting with Bezels
- Tube Set Charm by Kim St. Jean
- Prong Basket Pendant by Kim St. Jean
- NEW DVD Series – Stone Setting with Cold Connections
- New DVD Series – Stone Setting with Wire
- NEW DVD Series: Introduction to Stone Setting by Kim St. Jean
- Featured Tool: Bracelet Bending Plier
- NEW Dvd by Eva Sherman
- Fun, Fast Fold Forming DVD Series
- Double Band Ear Cuff from Alex Simkin
Bracelet Sizer
by Judy Ellis, Wirejewelry.com
Wire Jewelry Tip for July 15th, 2016
Bracelet Sizer
by Albina Manning
Today we feature a quick tip from Albina Manning on how to make and use a bracelet sizer using a common household item – a Styrofoam cup.
Albina Says:
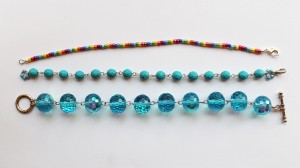
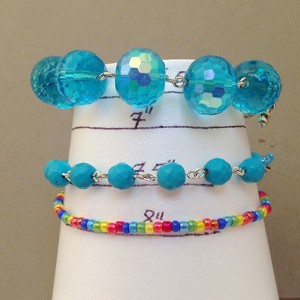
I made three bracelets that are the same length (8″) but they fit differently because the size of the beads. You can make your own bracelet “sizer” from Plastic or Styrofoam cup.
How to make your own Bracelet Sizer:
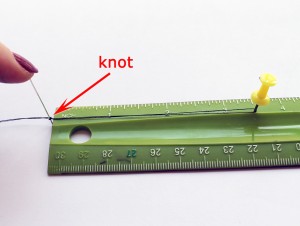
Step 1. I made templates with pieces of thread, one for each size.
Step 2. Fold the thread in half; place a knot half size away from the fold. For example, for 7″ size, place a knot 3 ½” away
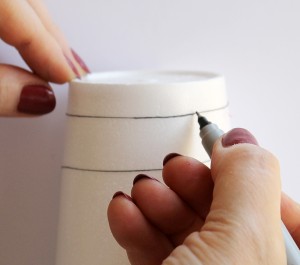
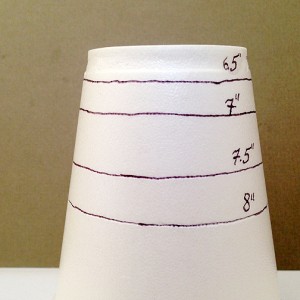
Step 3. Turn the Styrofoam cup upside down and slide the thread templates on it. Mark the cup with sharpie marker tracing on the threads.
Step 4. Slide your bracelets to determine the size.
This is such a simple and yet useful tip – how can you pass up using it every day!
To see more of Albina’s tips – CLICK HERE!
Happy Wrapping!
![]()
Click to Receive Daily Tips by Email






Kathy
October 12, 2016 at 6:52 am
I love the simple way to mark a bracelet size by using a Styrofoam cup!!
Thanks for the tip!