- NEW DVD Series – Stone Setting with Bezels
- Tube Set Charm by Kim St. Jean
- Prong Basket Pendant by Kim St. Jean
- NEW DVD Series – Stone Setting with Cold Connections
- New DVD Series – Stone Setting with Wire
- NEW DVD Series: Introduction to Stone Setting by Kim St. Jean
- Featured Tool: Bracelet Bending Plier
- NEW Dvd by Eva Sherman
- Fun, Fast Fold Forming DVD Series
- Double Band Ear Cuff from Alex Simkin
Jewelry Component Templates and Tutorial
by Judy Ellis, Wirejewelry.com
Wire Jewelry Tip for December 11th, 2015
On the 5th Day of Christmas…
Christmas Jewelry Component Templates from Judy Larson
Our good friend Judy Larson shared her Twelve Days of Christmas Jewelry Templates and Tutorials with us a few weeks ago and say” feel free to share them with everyone!” – So in the spirit of Christmas and sharing, I wanted to do just that, but I especially want to send out a a special “Thanks” to Judy for sharing such great tutorials with us!
I hope that you enjoy!
Judy says:
The step by step tutorials in this series were written assuming that you have some jewelry making experience and follow all safety precautions. The tutorials do not show basic jewelry making skills or how to solder, rivet or use resin. Check online for videos and tutorials. There are great DVD sets on these subjects on WireJewelry.com
The 6″ sheet metal square used in this series is composed of three 2″x6″ sections completely filled with jewelry component templates. Twelve jewelry sets or pieces can be made with this template by adding just a few short pieces of pipe, some beads and jewelry findings and 18 and 20 gauge round wire. Let your imagination run wild!
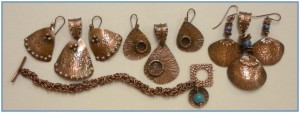
The jewelry component templates in the left section will make three sets of earrings with matching pendants as well as a charm for a bracelet. The directions for the byzantine chain are not included.
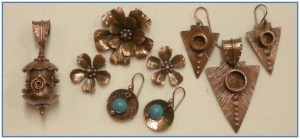
The jewelry component templates in the center section will make one pendant, one set of earrings, one set of earrings with matching pendant and three flower components. Hint: Connect the flowers for a beautiful necklace.
The jewelry component templates in the right section will make a bracelet component, two sets of earrings with matching pendants and a tab style pendant.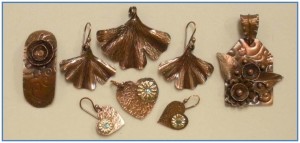
Directions:
- Copy the templates.
- Transfer the designs to your sheet metal.
- Cut the designs out.
- File any sharp edges.
Heart Set – Earrings and Pendant:
Materials:
- 24 gauge sheet metal—use the three heart templates
- Two bead caps for 8mm beads
- One bead cap for a 10mm bead
- Three 16 gauge decorative rivets OR Three small flat backed crystals that will fit the top of the rivets and jewelry glue (shown)
- Set of purchased ear wires or make your own
- Large jump ring (shown) or decorative bail
Tools and Other Supplies:
- Tools for your preferred method of cutting out sheet metal shapes
- Mini TruStrike Designer/Texture Hammer
- Rubber or plastic mallet
- Bench block
- 1.5mm hole punch Riveting hammer
- Flush cutter
- Flat and chain nose pliers
- File Jewelers glue
- Ultra fine point permanent marker
- Liver of sulfur
- #0000 steel wool
Directions:
- Copy the three heart templates.
- Transfer the designs to your sheet metal.
- Cut the hearts out using your preferred method for cutting sheet metal.
- File any sharp edges.
- Use a 1.5mm hole punch to make holes for hanging each piece.
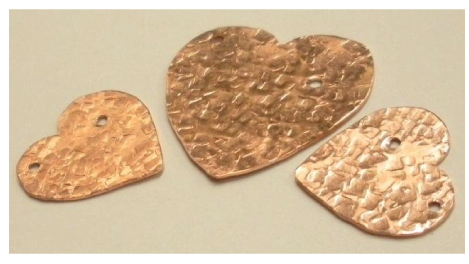
- Place each heart shape on a bench block. Use the Mini TruStrike Designer/Texture Hammer to texture each heart.
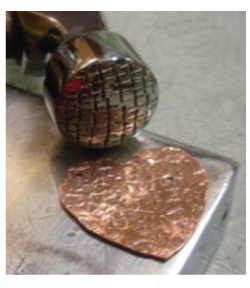
- The metal pieces will no longer be flat after texturing. Place each piece on a bench block and use a rubber or plastic mallet to flatten them.
- Place the bead caps on the bench block. Slightly flatten them using a rubber or plastic mallet.
- Position the bead caps on the hearts. Using an ultra fine point permanent marker, mark where the rivet hole needs to be punched. Use a 1.5mm metal hole punch to make the holes.
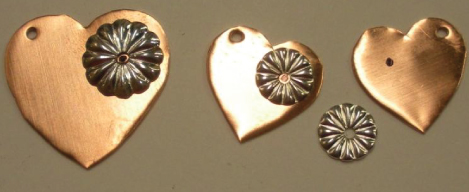
- Rivet the bead caps in place.
- Glue the decorative crystals on top of the rivets.
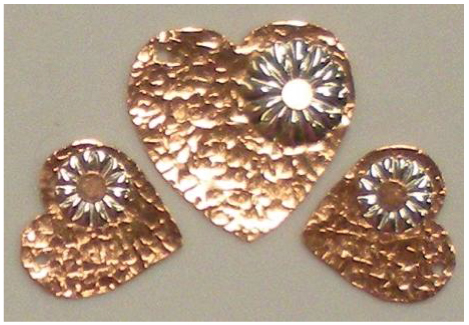
- Attach ear wires to the earrings and the jump ring or bail to the pendant.
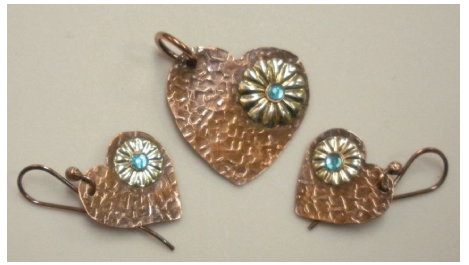
- You can leave your pieces bright and shiny or use liver of sulfur to patina them. Buff with 0000 steel wool to bring out the dimension of your texturing.
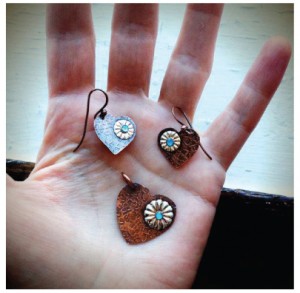
I hope that you will enjoy using these templates from Judy and making some of her projects as well as some you come up with. To help you get started on your creative journey – I’ve got a little gift!
Use Promo Code TREE10 to save a 10% off any product site-wide! This Promo Code is good until Dec. 24th, so get shopping today! Remember…anything ordered by Dec. 15th is guaranteed delivery by Dec. 24th.
Happy Wrapping!
![]()
Click to Receive Daily Tips by Email


Darlene Wilkinson
December 11, 2015 at 8:52 pm
Thanks for all this info and downloads. I want to get started. All included and in a way gets you started without finding patterns . Thanks…
Debi Woods
December 13, 2015 at 7:21 am
Totally awesome…. I have not tried working with the rivets yet, but I am sure going to try it now…
Beautiful work, and I LOVE wirejewelry.com…. ya’ll are the best..
Sidney Riggs
January 7, 2016 at 11:49 pm
Your blog is very interesting. Nice to find the great details over here component templates.