- NEW DVD Series – Stone Setting with Bezels
- Tube Set Charm by Kim St. Jean
- Prong Basket Pendant by Kim St. Jean
- NEW DVD Series – Stone Setting with Cold Connections
- New DVD Series – Stone Setting with Wire
- NEW DVD Series: Introduction to Stone Setting by Kim St. Jean
- Featured Tool: Bracelet Bending Plier
- NEW Dvd by Eva Sherman
- Fun, Fast Fold Forming DVD Series
- Double Band Ear Cuff from Alex Simkin
Twisted Forged Cuffs
by Judy Ellis, Wirejewelry.com
Wire Jewelry Pattern for December 9th, 2015
12 Days of Christmas Tips
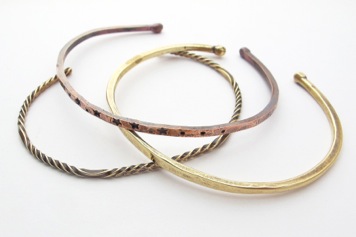
To continue with our Christmas Tips/Patterns I wanted to share this fantastic Twisted Forged Cuffs pattern from our good friend Kate Richbourg. Perfect as a Holiday gift, these simple and elegant cuffs are great for anyone who wants to try their hand at metal working. So, dig out your torch, your fire brick and grab your favorite metal and get started!
On the 4th Day of Christmas…
Twisted Forged Cuffs
Designed by Kate Richbourg
Skill Level: Beginner/All
Materials
- 6-7″ of wire depending on wrist size. For this project I used 12-gauge copper square wire, but you may substitute wire and shape of your choice. This project is appropriate for 14-gauge wire and thicker..
Tools
- Chasing hammer
- Bench Block
- Bracelet Mandrel or Bracelet Bending Pliers
- Butane Torch
- Solder Tweezers
- Soldering Surface (like a kiln brick or charcoal block)
- Heavy Duty Flush Cutters
- 2mm Letter stamps
- Star design stamp
- Period stamp
- File
- Ruler
- Plastic or rawhide mallet
- Steel wool
- Liver of Sulfur
- Table Vise
- Vise Grips
Instructions:
- The measurement for the cuff is about 1/2-2/3″ smaller than your wrist size. My wrist measures slightly less than 7″ so I cut my wire just slightly under 6 1/2″. The balls on the ends of the wire will also take up some length.
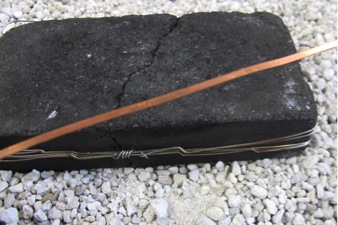

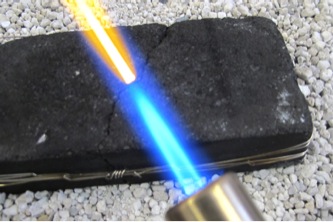
- Grip wire securely in cross lock soldering tweezers. Ignite the torch and heat the bottom 1/2″ of the wire. As soon as the wire begins to glow, move torch underneath the wire so the tip of the flame touches the end of the wire. The wire will become molten and a ball will start to form. When the ball measures about 2-3mm remove torch and quench wire. Be sure to work over a fireproof surface, as it is possible that if you overheat the wire the ball may drop off the end. If this happens just repeat the steps to ball the wire. There is no need to pickle the wire at this time.

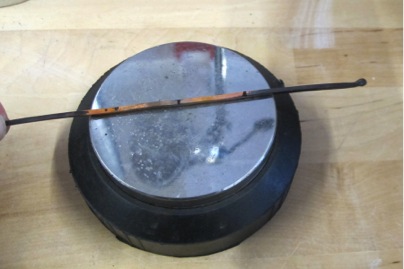
- Find the center of the cuff and measure out 1″ on both sides and mark using a permanent marker. Place on a bench block and use a chasing hammer to flatten this section.
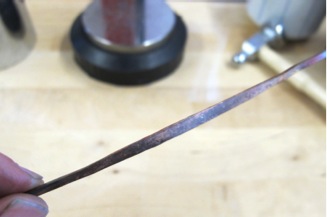

- Place the cuff on a bench block and stamp the cuff with your design of choice using metal stamps and a brass mallet. For this cuff I used an initial, small star and period stamps.

- To form the cuff, shape around an oval bracelet mandrel.
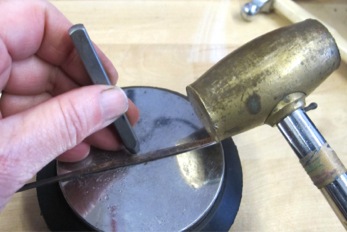

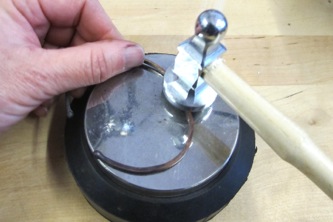
- Refine the shape and work-harden the cuff by placing it on the bench block and tapping lightly with the chasing hammer. At this point you may wish to pickle the cuff to remove firescale. I used the firescale as part of my patina process and dipped the cuff in liver of sulfur to completely darken. I used fine gauge steel wool to polish and tumbled the cuff for 30 minutes to shine and work harden.
- Twisted Cuff: Cut square wire to desired size for cuff. Clamp one end of the wire in a vise and the other in a p air of vise grip pliers. Turn on torch and focus the flame on a 1″ segment of the wire just below where the wire emerges from vise.
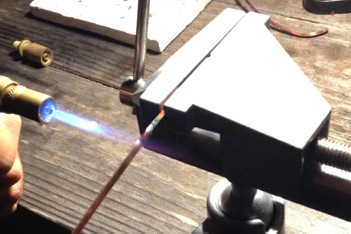

- As the wire begins to glow, hold the torch steady with one hand and twist the vise grips clockwise with your opposite hand keeping a tight tension on the wire as you do so. The wire should be heated enough so that the wire twists easily. If it does not twist right away, stop and heat a bit more and then try twisting again.
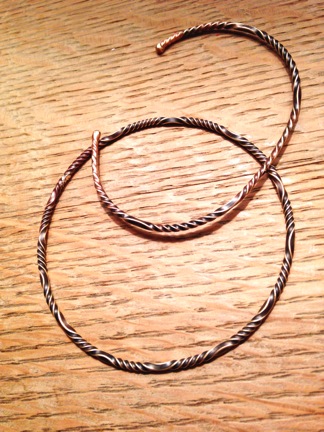
I hope that you enjoy making these cuffs! To help kick off your Holiday season – here’s a little gift from all of us here at WireJewelry.com- Take 10% off of anything Site Wide with Promo Code TREE10. This code is good from Dec. 2nd to Dec. 24th -so get a little wire, a few beads or any type of tools you might need to help make your holiday’s bright!
Happy Wrapping!
![]()
Click to Receive Daily Tips by Email






Gail Chambers
December 9, 2015 at 2:45 pm
Thanks! This was a nice and well taught tutorial! Nice job!
paula ungar
December 16, 2015 at 7:10 am
great videos.
William Pool
December 9, 2015 at 6:07 pm
I like the cuff bracelet ideas.
Merry Christmas!
William Pool
darlene wilkinspn
December 14, 2015 at 6:07 pm
Thank you for all the ideas and tips. Appreciate it…
Dana
January 1, 2016 at 9:53 am
This is such an inspirational post/tutorial. Thank you for sharing your artwork.