- NEW DVD Series – Stone Setting with Bezels
- Tube Set Charm by Kim St. Jean
- Prong Basket Pendant by Kim St. Jean
- NEW DVD Series – Stone Setting with Cold Connections
- New DVD Series – Stone Setting with Wire
- NEW DVD Series: Introduction to Stone Setting by Kim St. Jean
- Featured Tool: Bracelet Bending Plier
- NEW Dvd by Eva Sherman
- Fun, Fast Fold Forming DVD Series
- Double Band Ear Cuff from Alex Simkin
Spiral Link Connector
by Judy Ellis, Wirejewelry.com
Wire Jewelry Patterns for October 7th, 2015
Spiral Link Connector
by Dawn Horner
Today I bring you a great beginner pattern by one of our latest contributors – Dawn Horner. (Note: This is not a pattern to show you how to make the bracelet, but a pattern to show you how to make the connector. )
Dawn says: “The Spiral Link component can be used in bracelets or neck chains paired with wire-wrapped beads or used alone connected by jump rings. Consider using them for simple earrings also with a crystal or bead dangling on one end and connecting ear wires to the other. Be warned, these can become addictive like potato chips, you can’t enjoy just a few!”
Enjoy!
Spiral Link Connector
Designed by Dawn Horner © 2015
Skill Level: Beginner
Materials
- 18 gauge round dead soft wire
Tools
For each link cut 7 inches of 18 ga wire. This amount allows for a bit of extra wire to hold onto while forming the link. Once proficient in the action, you may be able to cut the wire slightly shorter. Start by closing 4 rings and opening 2 others.
Instructions:
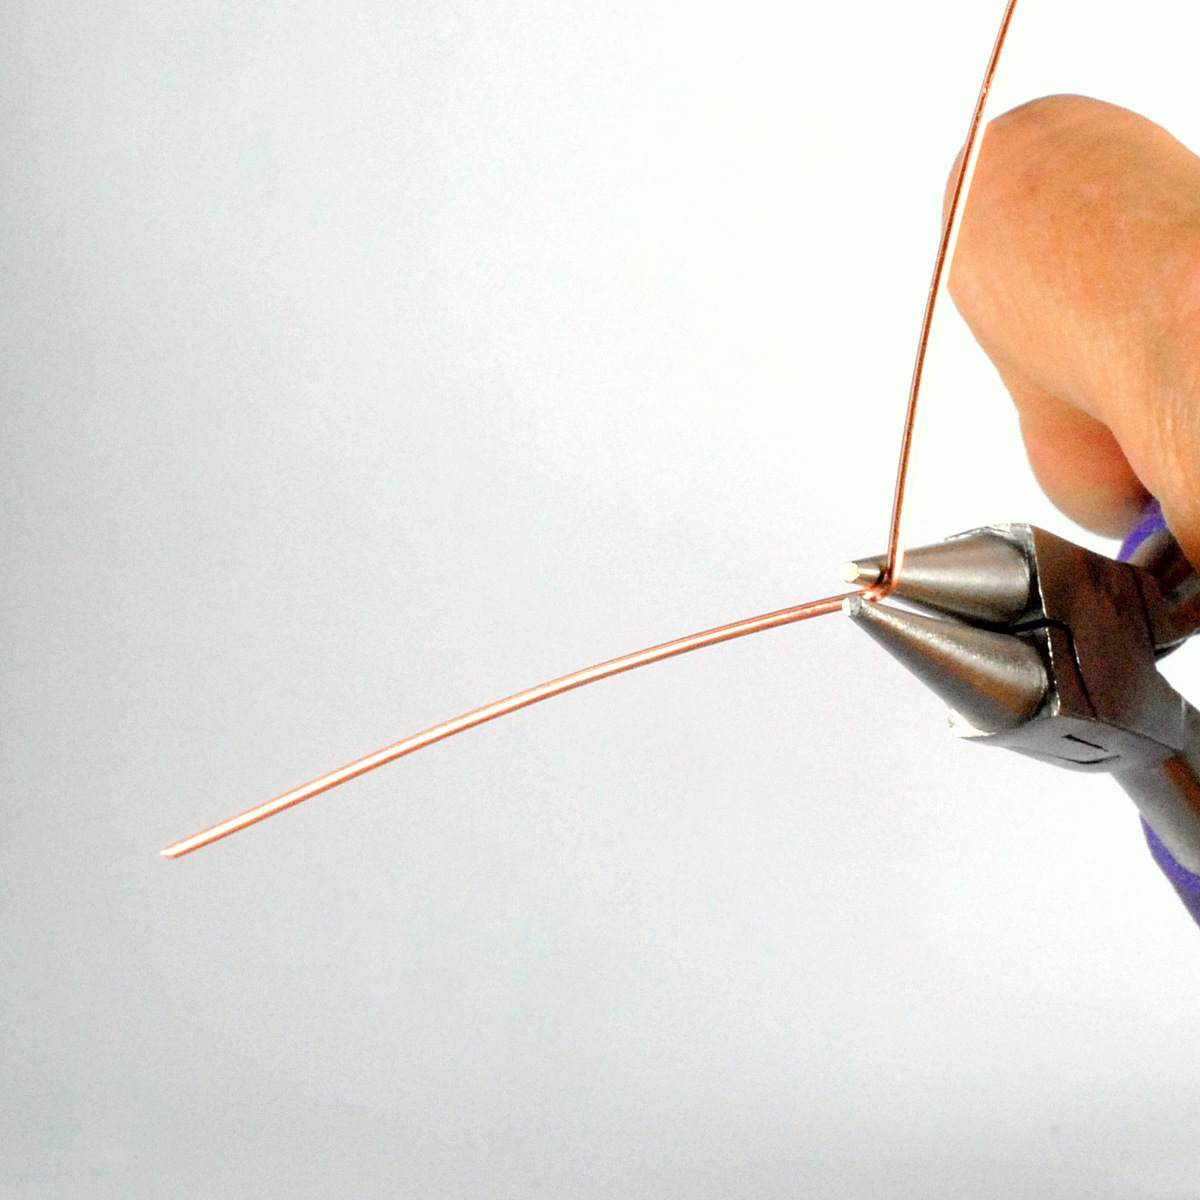
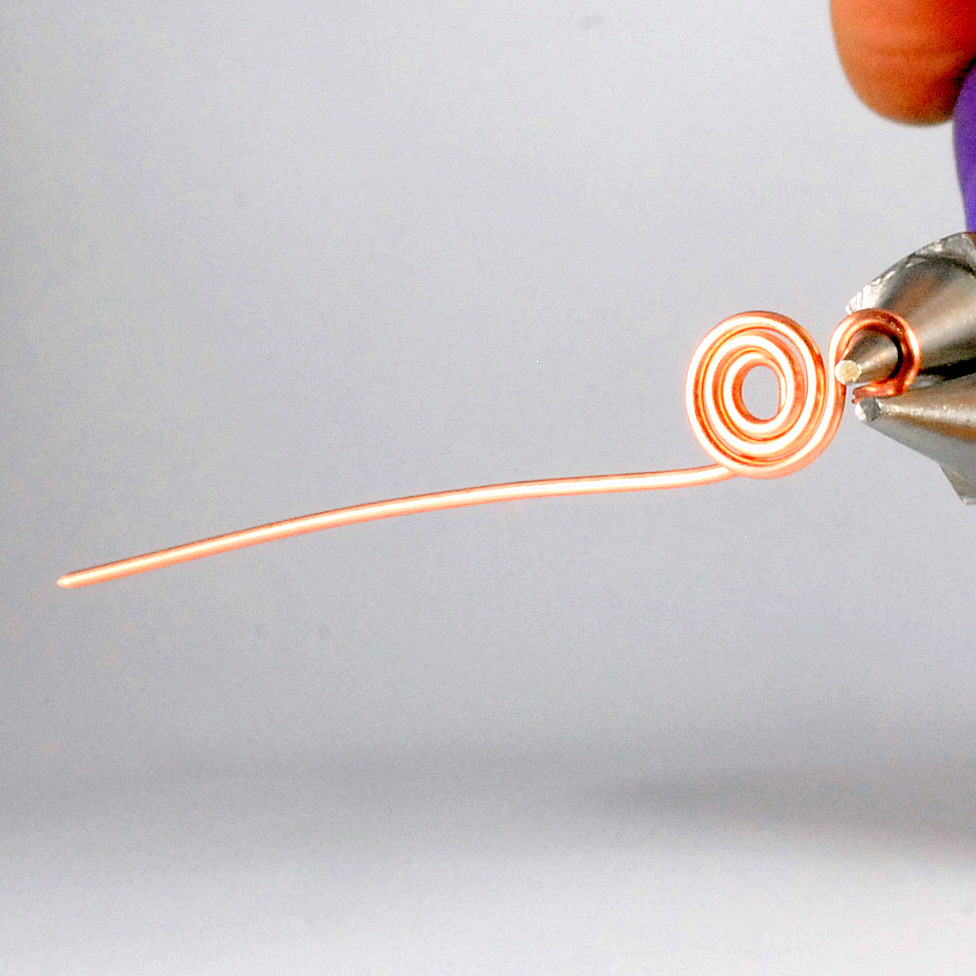
- Cut 7 inches of 18 ga wire using flush cutters. Holding the wire horizontally, measure 2 inches in from the left tip (Tip A). Hold the wire at the 2 inch mark with round nose pliers and make a 90 degree bend by pushing the right side wire up against the pliers with thumb or fingers.

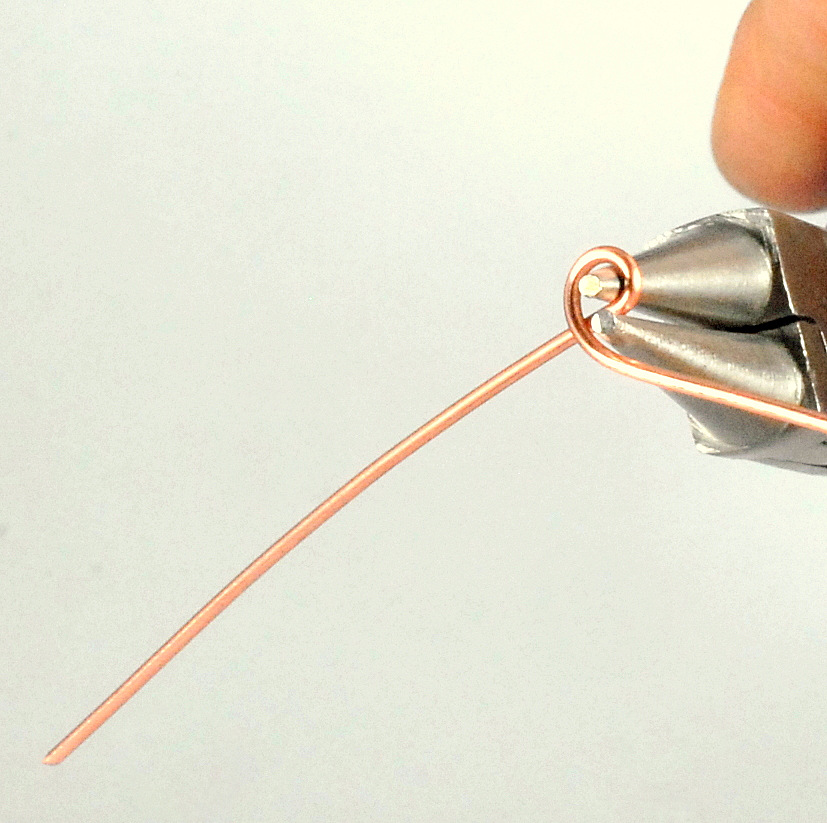
- Still holding the wire with the round nose pliers, grasp the longer end that’s pointed upwards now (Tip B) and wrap it around the round plier end counterclockwise as far as able making a small loop.

- Hold the piece just in your non-dominant hand and continue to manually form a larger spiral counter clockwise by winding the wire around the initial loop for 2 more revolutions.

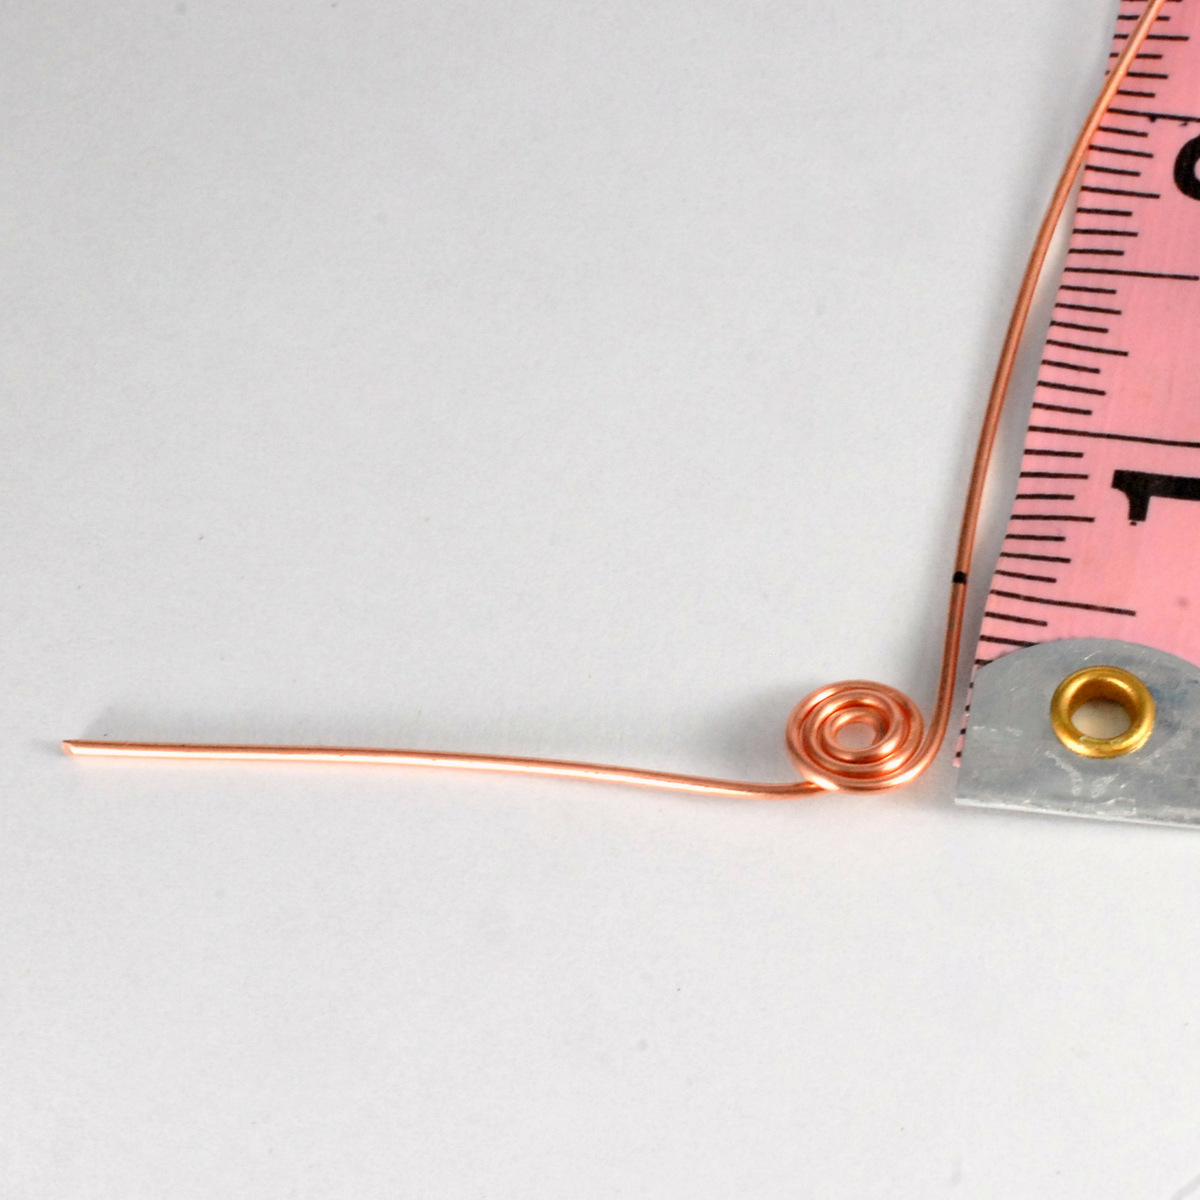
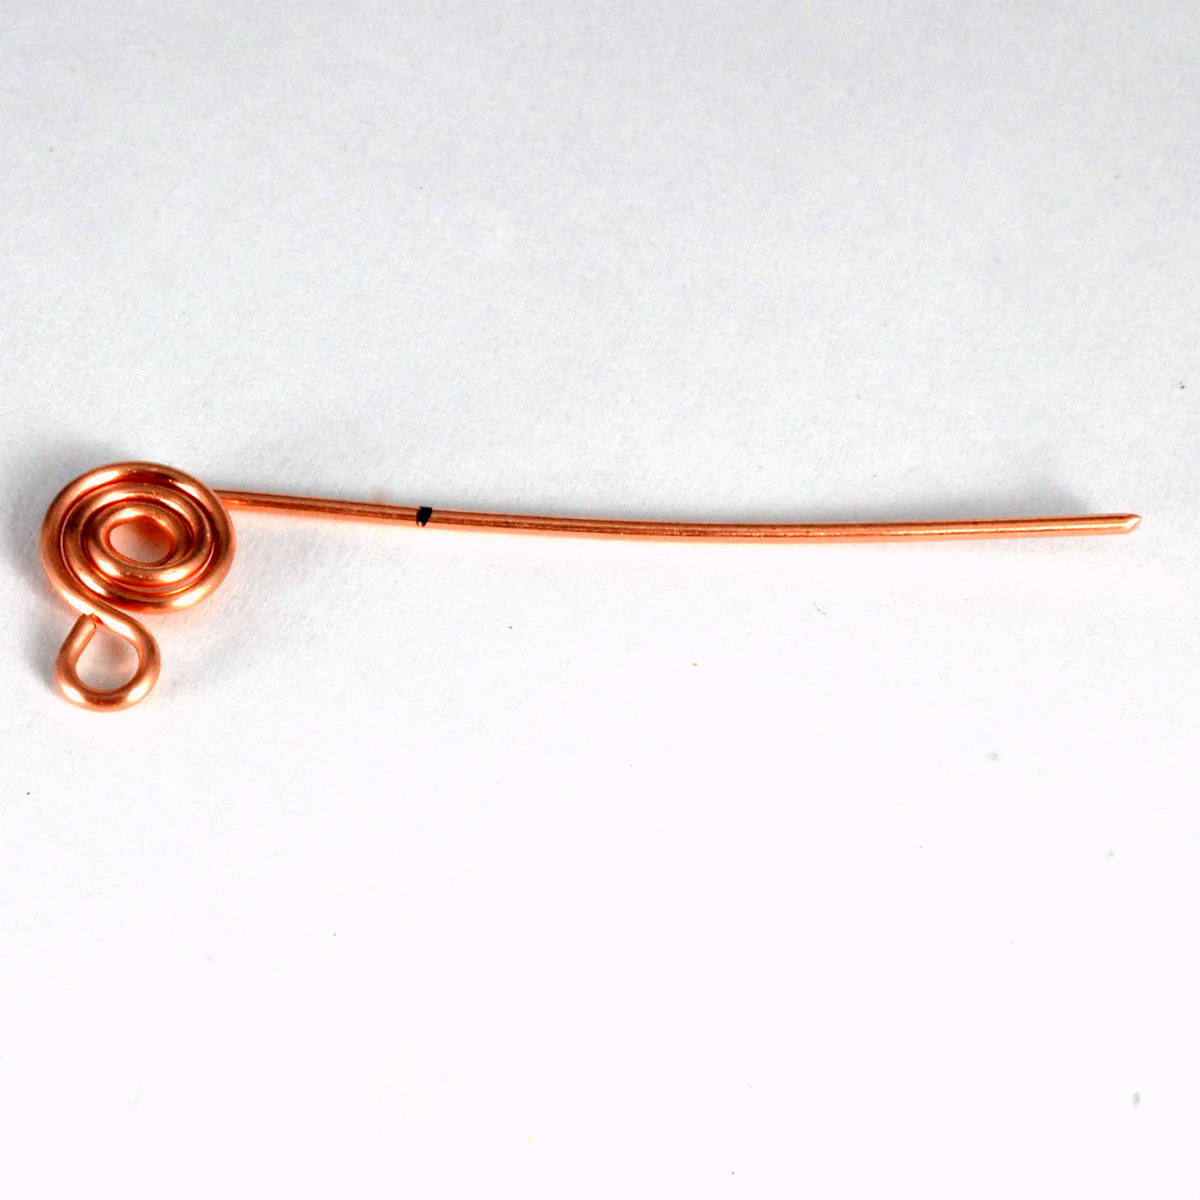
- End with wire Tip B pointed at a 90 degree angle to the initial first 2 inches Tip A. Measure and mark Tip B wire at 1/2 inch from spiral. Cut at the mark with flush cutters, keeping the flat side of the cutters towards the spiral piece, and the indented side of the cutters away from the work you are keeping.

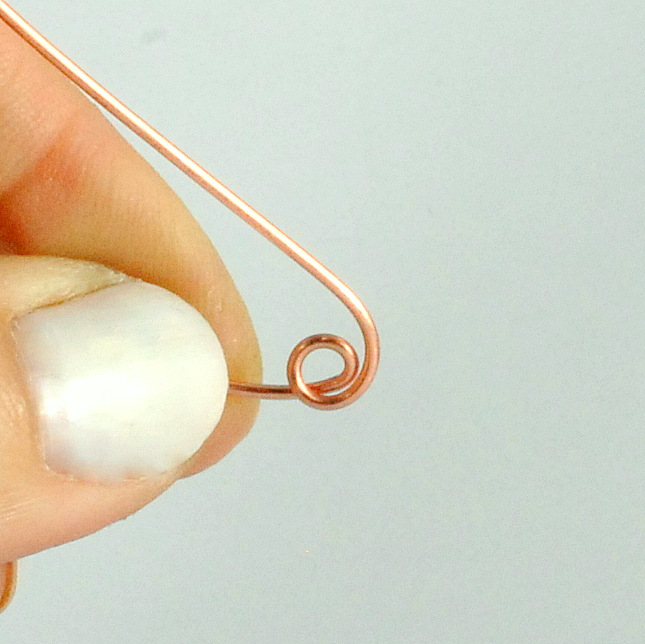
- Using round nose pliers, grasp the tip you just cut at the end and roll in towards the spiral making a closed loop. The end of the wire should land flush against the side of the spiral.

- With the piece positioned as above, adjust the opposite end Tip A so it’s at a 90 degree angle to the spiral.

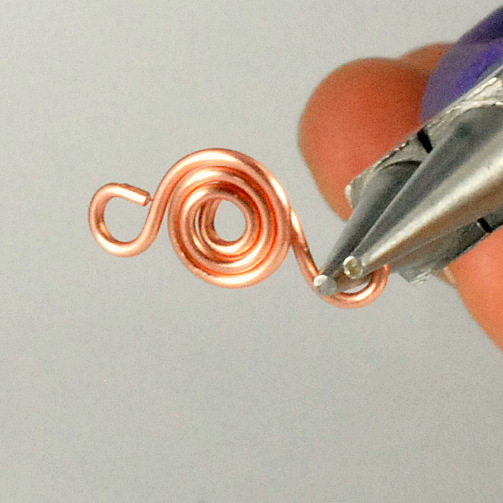
- Measure and mark this end the same as the prior one, 1/2 inch from center of spiral. Trim with flush cutters, flat side towards the spiral.

- Repeat rolling the trimmed end into a closed loop using the round nose pliers. This wire end will land against itself but slightly under the spiral formed.

- If using bare copper or sterling silver, additional dimension in the link can be brought out by antiquing or tarnishing the piece using Liver of Sulfur solution. If you want a larger loop on either end of the spiral piece to accommodate bigger jump rings or connecting components, measure a bit more wire than 1/2 inch before trimming. Then roll with the round nose pliers a bit further down the plier making a larger loop.
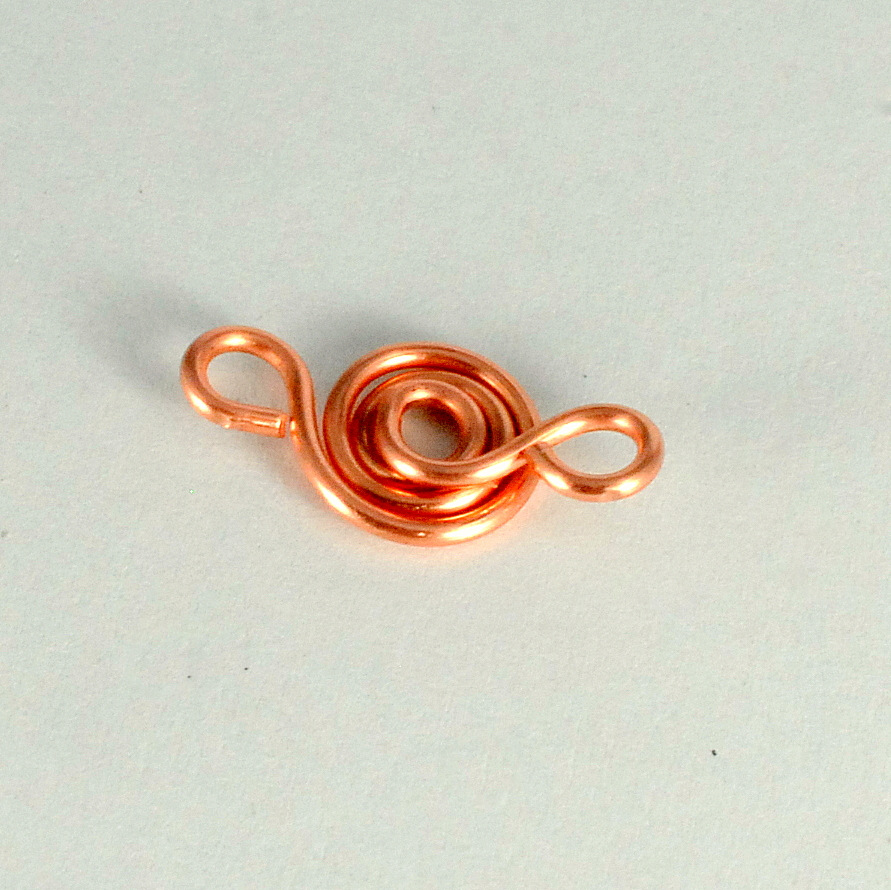
Congratulations! You’ve just made your first Spiral Link Connector !
I hope you enjoyed this quick and easy tutorial from Dawn! Check back for more great tips or articles from our new contributors!
Happy Wrapping!
![]()







Cindy
October 8, 2015 at 8:36 pm
I am not a wire wrapper but this bracelet by Dawn Horner and Judy looks like perhaps I could do it after a few tries. I like the idea of making your own chain. This makes a big statement in jewelry designs. Thank you for the tip (pattern).
Cindy
Dawn
October 14, 2015 at 9:47 am
You’re welcome Cindy! Thanks for checking it out
-Dawn
Lynne
October 21, 2015 at 9:29 pm
Thankyou I really enjoy the inspirations I receive with the various kinds of wire work. OOh just wish their was not such a big difference in our Aussie Dollar exchange rate, and on top the postage rate imposed. I would be able to purchase my wire and products required.
Lynne