- NEW DVD Series – Stone Setting with Bezels
- Tube Set Charm by Kim St. Jean
- Prong Basket Pendant by Kim St. Jean
- NEW DVD Series – Stone Setting with Cold Connections
- New DVD Series – Stone Setting with Wire
- NEW DVD Series: Introduction to Stone Setting by Kim St. Jean
- Featured Tool: Bracelet Bending Plier
- NEW Dvd by Eva Sherman
- Fun, Fast Fold Forming DVD Series
- Double Band Ear Cuff from Alex Simkin
Fish Hook Ear Wires
by Judy Ellis, Wire-Sculpture.com
Wire Wrapping Tip June 6, 2014
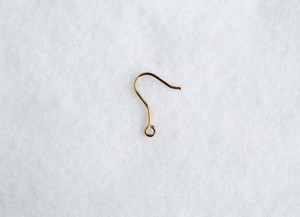
How to Make Fish Hook Ear Wires
Here’s a great little DIY tutorial I ran across this week – Making Your Own Fish Hook Ear Wires. Ear wires are so easy to make, that I thought this would be worth sharing. With a little practice and a few tools, you can be creating your own today!
Materials and Tools:
- 1mm wire. (If you’re not sure how to convert mm’s to gauge size or inches, use the handy table below.)
- Round Nose pliers
- Flat Nose pliers
|
Gauge Size
|
10
|
12
|
14
|
16
|
18
|
20
|
21
|
22
|
24
|
26
|
28
|
30
|
|---|---|---|---|---|---|---|---|---|---|---|---|---|
|
Diameter in inches
|
.1019
|
.0808
|
.0641
|
.0508
|
.0403
|
.0320
|
.0285
|
.0253
|
.0201
|
.0159
|
.0125
|
.0100
|
|
Diameter in mm
|
2.588
|
2.05
|
1.63
|
1.29
|
1.02
|
.813
|
.723
|
.643
|
.511
|
.404
|
.320
|
.254
|
Instructions:
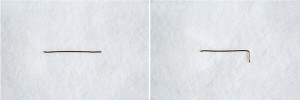
1. Cut around two inches of wire.
2. Bend around 1mm of wire 90 degrees to the rest of the wire.
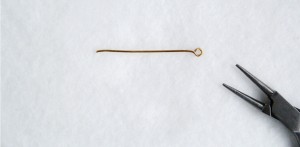
3. Use your round nose pliers to turn a loop in the bent wire.
4. Using your flat nose pliers hold the wire just under the loop. Bend the rest of the wire about 45 degrees.
5. Bend the wire around the handle end of your pliers to create the curved section that goes through your ear.
6. Cut the excess wire off and bend the end of the wire very slightly.
7. Use a nail file to smooth the end of the wire so there are no sharp edges.
8. Hammer the curved section (the part that goes in your ear) gently so it keeps its shape.
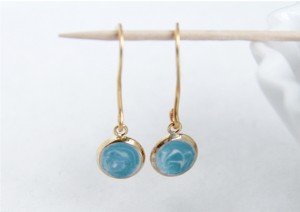
Congratulations! You’ve made your first pair of Fish Hook Ear Wires.
If you want to learn how to do more extensive wire work, take a look at our selection of Wire Jewelry Books and Instructional DVDS. We have many plenty choose from.
Do you love this information- why not sign up today for your FREE Jewelry Making Patterns. It’s a great place to start!
Happy Wrapping!
![]()
More DIY wire jewelry projects
Click to Receive Daily Tips by Email


Cora
June 6, 2014 at 6:37 pm
I find 1mm/18guage wire too thick for many people, and usually make earwires with 0.8mm/20guage wire.
Also, if you cut the wire twice as long, make the loop (Step 3 above)on each end, fold the wire in half, squishing the fold so the wires are parallel, and form the fish hook shape (Steps 4, 5 and 6 above) on the doubled wire, you have a matching pair!
Just cut the folded end off and follow Steps 7 and 8.
Mary Dillon
June 6, 2014 at 6:53 pm
Thanks for the lesson on fish hook ear wires, Judy. What I really liked is that there was a “print” tab at the top. Why doesn’t that appear on all your tips? It makes for a much nicer copy when I want to save something – and also prints in large enough font that I can read it!
Appreciate all the good tips you share.
Mary