- NEW DVD Series – Stone Setting with Bezels
- Tube Set Charm by Kim St. Jean
- Prong Basket Pendant by Kim St. Jean
- NEW DVD Series – Stone Setting with Cold Connections
- New DVD Series – Stone Setting with Wire
- NEW DVD Series: Introduction to Stone Setting by Kim St. Jean
- Featured Tool: Bracelet Bending Plier
- NEW Dvd by Eva Sherman
- Fun, Fast Fold Forming DVD Series
- Double Band Ear Cuff from Alex Simkin
Wire-Wrapped Two Loop Connector
by Judy Ellis, Wire-Sculpture.com
Wire Wrapping Tip May 30, 2014
Making a Wire-Wrapped Two Loop Connector
This week, while looking through patterns, I came across this great wire-wrapping tutorial by our good friend, Albina Manning. She gives us simple pattern for making an easy wire-wrapped two loop connector. These are perfect for earrings, toggles or anything else you can dream up! I hope you enjoy it as much as I did.
Materials and Tools:
- round dead soft wire, 20ga-24ga*
- Wire cutters
- Round nose pliers
- Bail making pliers, 9mm** (or any cylindrical object like a pen or a marker)
- Nylon jaw pliers (optional)
- * Size of the wire depends on the size of the spacer you are going to make. The bigger spacer the thicker the wire.
- ** Diameter of the bail making pliers depends on the size of the spacer.
1. You can start working from the spool. Wrap the wire one and a half times around a 9mm jaw.
2. Place round nose pliers (or 2mm jaw of 6-step pliers) outside of the loop and just across the wire end as shown. Make a loop so it looks like “8”.
3. Insert the 9mm jaw back in the loop and continue wrapping the wire until it is across a small loop.
4. Repeat step 2 to make the second loop just across the first one.
5. Cut the wire leaving 6” tail. Make a wrap close to the last small loop.
6. Make 5-6 wraps on one side of the connector. These wraps do not have to be close to each other. Just make sure that the distance between the wraps is the same.
7. Make 5-6 wraps on the other side as well.
8. Bring the wire end to the first half; make one wrap close to the small loop. Place the wire end between two wraps and cut the wire. Using chain nose pliers, tack the end inside, making sure it does not stick out.
9. Place the connector between the nylon jaw pliers and slightly flatten it (this step is optional). Make only one small loop to make a one-loop connector.
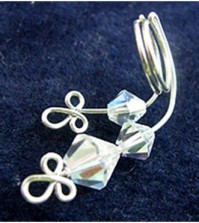
Here are two examples of earrings made with this technique.
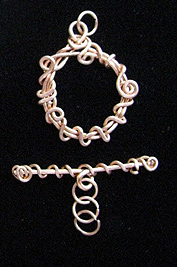
You can also use this technique to make a simple wire wrapped loop toggle.
We are always looking for new tips and ideas – send us yours today!
Do you love receiving this information? Why not sign up today for your FREE Jewelry Making Patterns. It’s a great place to start!
Happy Wrapping!
Click to Receive Daily Tips by Email


Jane Elizabeth Duke
May 30, 2014 at 9:52 am
Great idea! I have done something similar but it never looked quite finished. Thanks for another great idea!
Barbara
May 30, 2014 at 2:13 pm
Thank you Judy, I have been wondering how to make a toggle clasp in titanium wire for along time. Your instructions are very helpful.
Rachel Ison
August 22, 2014 at 3:09 pm
What a great connector!Thanks!